Calligraphy is an art of writing the fonts with specially designed nibs and pens to write artistically. It is accessible for use in various fields like logo design, texts in greeting cards, envelope designs, and so much more. There are different types of nibs that give out different types of results during calligraphy and lettering. And the quality and type of handwriting that come up also depend upon how you, the calligrapher, hold the pen. Different nibs create different types of strokes in different types of fonts.
Calligraphy includes styling of uppercase letters, lowercase letters and numbers alike. With the usage of different ways of calligraphy and the nibs, it has gained much popularity in recent times. In this blog, we explore various lettering and calligraphy projects that inspire you to learn calligraphy.
1. Artistic Envelopes:
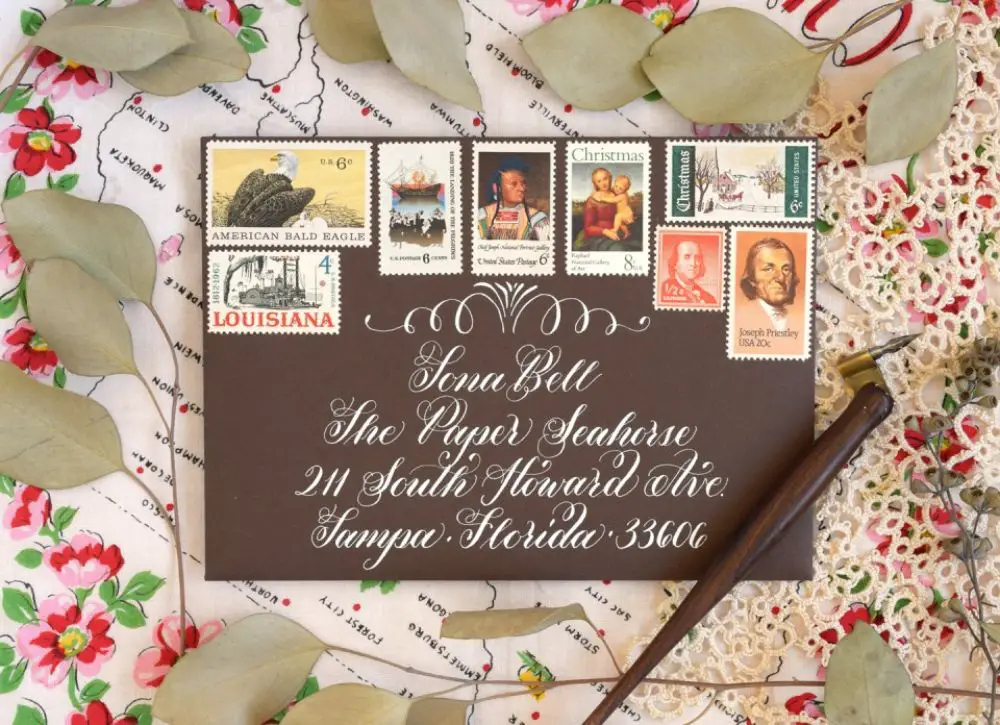
Any envelope looks beautiful and mysterious when it is designed well, along with calligraphic fonts. The image shows light strokes and fantastic flourishes. The receiver of such envelope feels special because of the calligraphy employed. Here, we perform calligraphy using a dip pen. A dip pen also called a nib pen, is a pen with a metal nib that has capillary channels like that of a fountain pen which mounts in a wooden pen holder. You can draw various calligraphic fonts using a different kind of tools. You can use crayons, pens, pencils, paintbrushes of various sizes and paper.
There can be two basic types of envelopes—ones with the calligraphy, and those without calligraphy. To create an envelope that has calligraphy, you need to keep certain things in mind. While purchasing envelopes, you need to look at the weight of the envelope. As the thickness of the envelope increases, it becomes a better option for the calligraphy to work. A thin papered envelope may bleed ink when you start drawing calligraphy on it. And you don’t want the calligraphy to bleed.
While buying envelope along with thickness, you should also check for the shade of the envelope. You should buy dark-coloured envelopes because dark colored envelopes need light-colored, opaque inks. These opaque inks are thick and colloidal/viscous. Hence, the viscosity of the ink does not let the ink bleed on the surface of the envelope. Moreover, you can use an envelope if the ink that you are using is opaque and viscous.
2. Personalized Artwork:
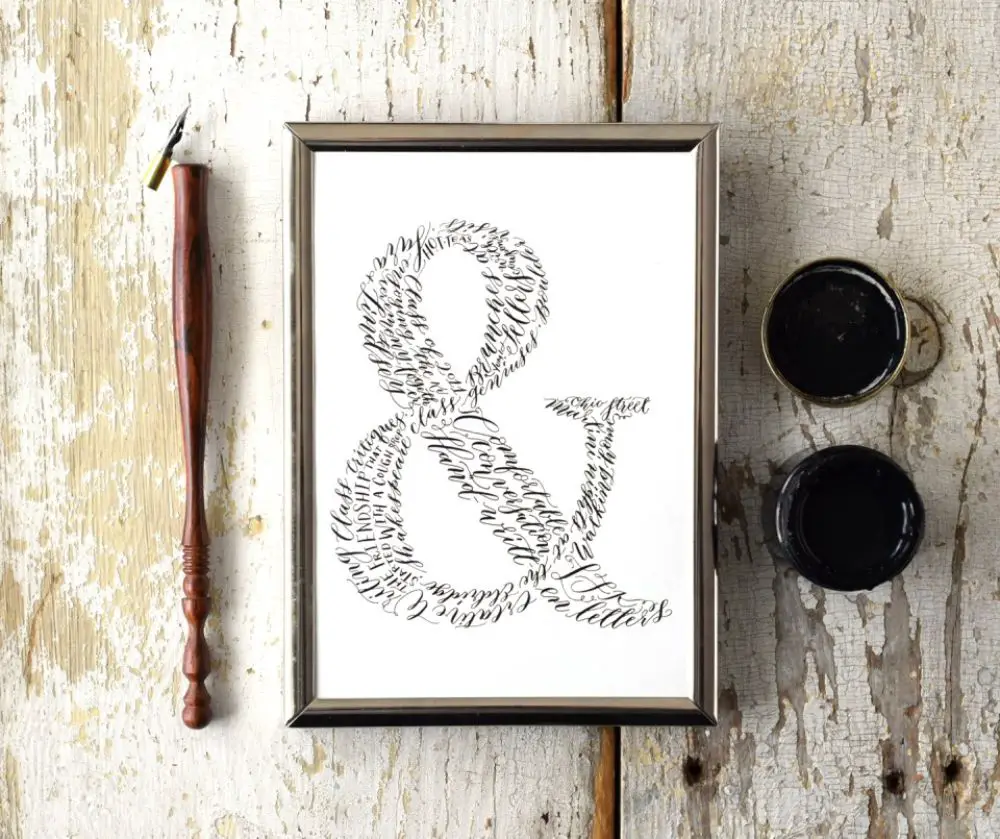
To make a style statement using your artwork, or to simply personalize them, you can use your calligraphic designs. You can use words or phrases that are synonymous with your personality like “Happiness”, “Positivity”, “Good Vibes Only” and the ideas are endless. You can use lettering art to personalize your artwork in unimaginable ways.
Lettering has always been an art, and it draws people in when they see it. Lettering should be with one or many alphabets with some words surrounding those letters. You can start by drawing the initial letter of your name with a pencil. Once you have perfected the initial, you can make a list of words that can surround the initial.
For instance, happiness, pizza, coffee, wanderlust, and so many more words are there to explore. Start writing those words with a calligraphy pen. Make sure to use different fonts for different words. But you should not cover the initial and leave the initial untouched. Once you are ready with the words, you would see that the initiative has emerged out more brightly and the words look beautiful. You can rub out the borders of the initials with an eraser, once the ink has dried up.
3. Logo Designing:

When you talk about any company under the sun, the first thing that you look at is a logo. Designing a logo is a big task because the company is going to be known only by a logo. A lot of sketching and making many designs goes into designing a logo. These days, calligraphy is helpful to design a logo. And the logo using calligraphy gives a personalized feel to a company and the logo itself. If you are targeting best branding techniques, then creating a hand-drawn logo while encompassing calligraphy in it can be the best option for you.
While using calligraphy to design a logo, you need to keep in mind that specific calligraphy evokes certain emotions and reactions. Hence, you should always make a note of which fonts to use for designing a logo through calligraphy and what kind of reaction you are bringing out.
For instance, if you are using Serif fonts, then Serif font is a small line trailing from the primary stroke of the letter. Serif fonts usually increase the readability of the letters. Serif fonts come out as traditional, professional, elegant and robust when you look at the psychology it targets.
4. Invites:
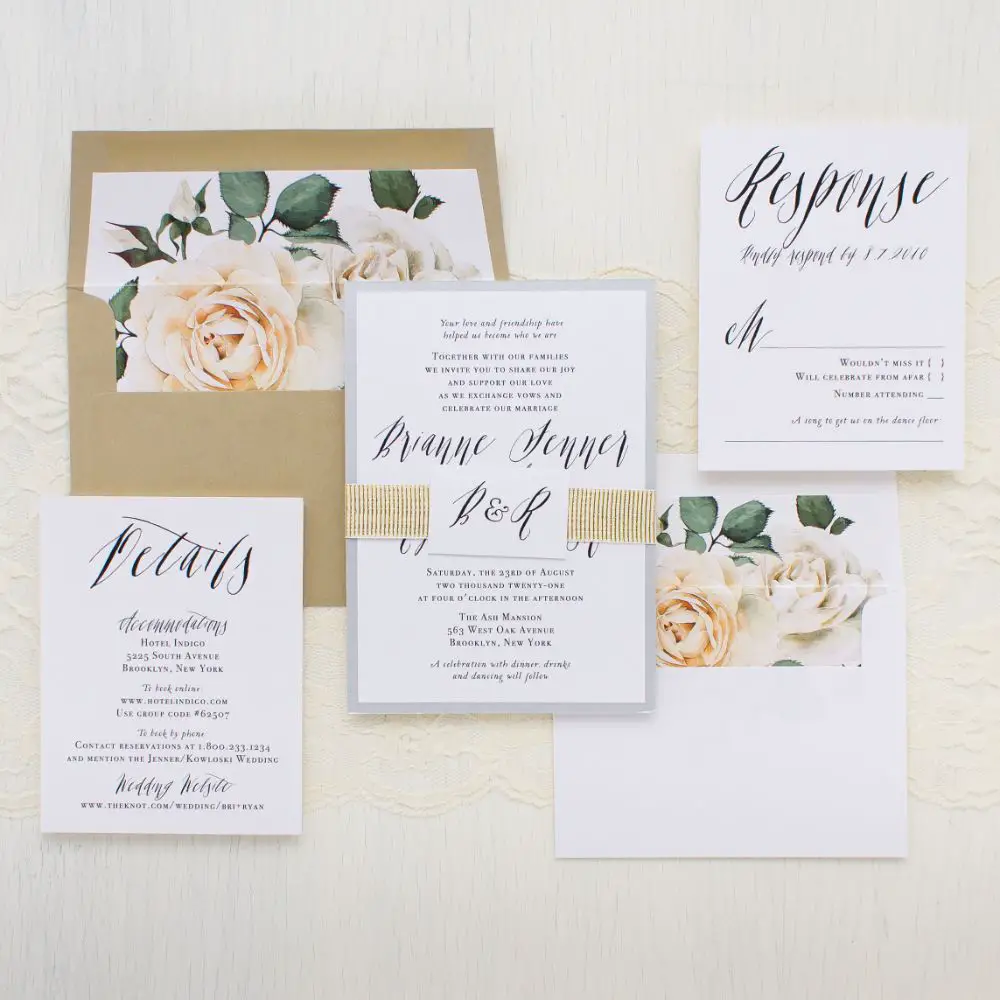
If you have ever visited Pinterest, you must have seen that calligraphy is applicable practically everywhere. And with designing invitations, calligraphy is very popular these days. A calligraphically customized invite becomes an apple of everyone’s eye and who would not love a beautiful invite for an occasion?
Especially if the invitations are for a party or wedding, the invites with calligraphy are the most significant hype. So, while creating an invite, you should make sure what kind of an occasion is it. You have to choose the fonts according to the nature of the invite. The selection of the fonts set the tone of the occasion and the reaction of the reader.
Because the type of fonts you select, talk about the occasion, let us take an example of a font type for calligraphy. Let us take into account Scriptina Pro font type in calligraphy. These fonts are very versatile and suit every calligraphy project. It is the more classic version of the Scriptina font family. It does not have many loops and swashes, which allows greater flexibility in the way the fonts appear.
With universal acceptability and versatility of these fonts, it would look good on wedding invitations as much as a casual menu.
5. Gift Tags:
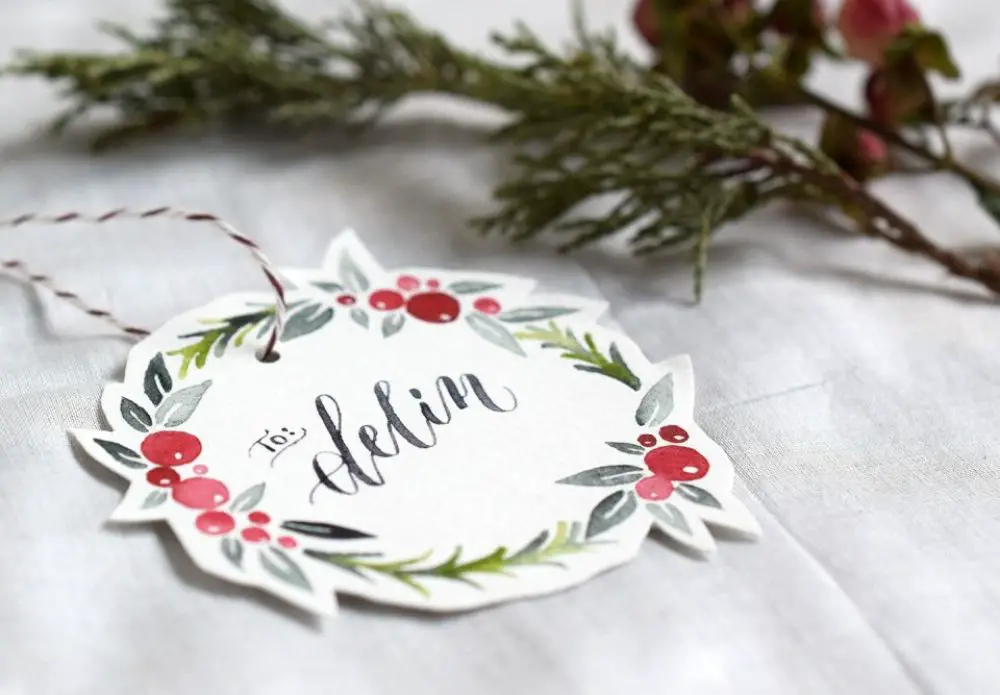
A gift tag could be a piece of paper attached to a gift, which has a handwritten message for or name of the receiver of the gift. These days, gift tags have been a rage and have created much hype around themselves. A gift tag is generally attached to a gift and is artistic. It can be multicolored and can have a picture of the receiver of the gift. It can have calligraphy over it to make it even more attractive.
While designing a gift tag, the thickness of the gift tag paper is significant. The thickness ensures how calligraphy ink behaves during its usage. You need a colored thick paper, calligraphy starter kit, bleed proof inks and watercolor brushes of various sizes. Start writing the words with bleed proof ink of your choice. Decorate the tag the way you like. Because the size of the tag is according to your choice, you can decorate it in innumerous ways. Once you have written the text down, let the ink dry up completely. Sometimes, it takes overnight for the ink to dry up entirely and become smudge-free.
Your gift tag is ready. Once the ink has dried up, you can punch a hole in the gift tag and pull a string through the hole. Tie this string up with the gift wrapping ribbon while wrapping the gift. It is how your tag appears on the top of the gift. Write the name of the receiver and the sender on the gift tag. The gift is now ready to go to the receiver of the gift along with your customized gift tag.
6. Place cards:
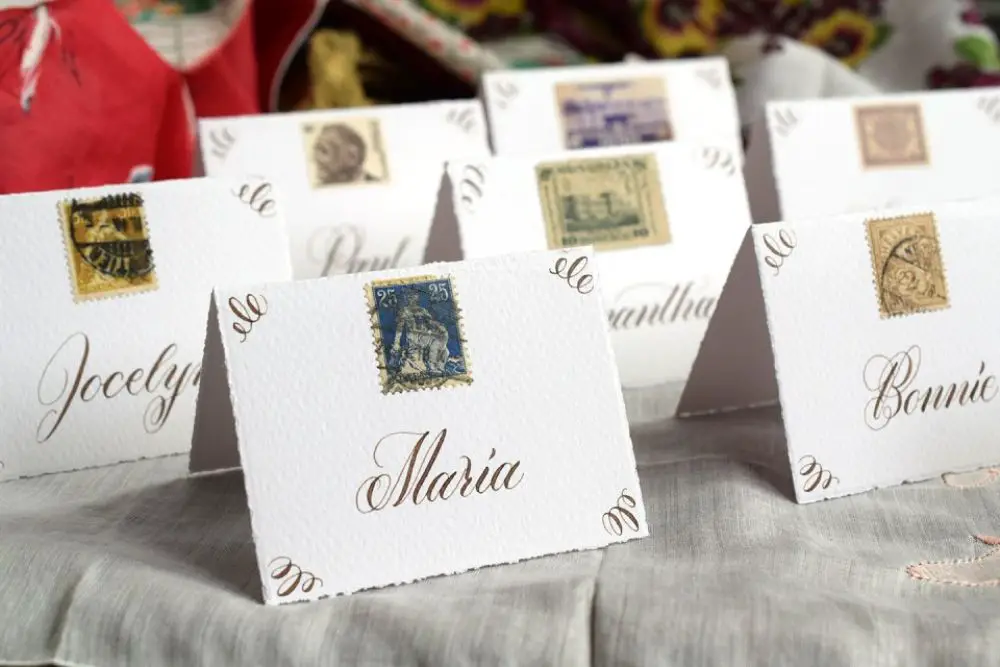
Place cards and wedding escort cards look synonymous. But they are not. Place cards direct the guests to their exact seating point at the venue of the said occasion. These place cards are traditionally put on each table to display the named guest’s place and their seat. Escort cards direct the guests to their tables. Certain occasions have place cards designed differently for their guests’ preferences.
For instance, you can have a celebration that entails dinner and desserts. And you have guests that are vegetarians and non-vegetarians. In this case, you can have place cards in green for vegetarians and red in case of no vegetarians. Hence, these colors let the servers know, which food to serve to which place card guests.
Now these place cards are in trend these days because they have a very fancy look. And combined with calligraphy, they offer even more elegant look to the place card. Calligraphic place cards become expensive if you get them customized on a website. But if you or a friend knows calligraphy, you should do it by yourself. A place card is a folded piece of paper indicating the name of the guest and the table number. Not much work to do, eh?
Get a piece of paper that is thick and can hold the calligraphy ink well. List out the number of the tables and the names of the guests who would be attending the event. Now, start writing the name of each of the guest with your calligraphy pen and ink. Make sure you use a thick, bleed proof ink that would not get smudged. Once you have written the names and the table numbers out, let the ink dry up completely. Your place cards are ready to be used.
7. Greeting cards:
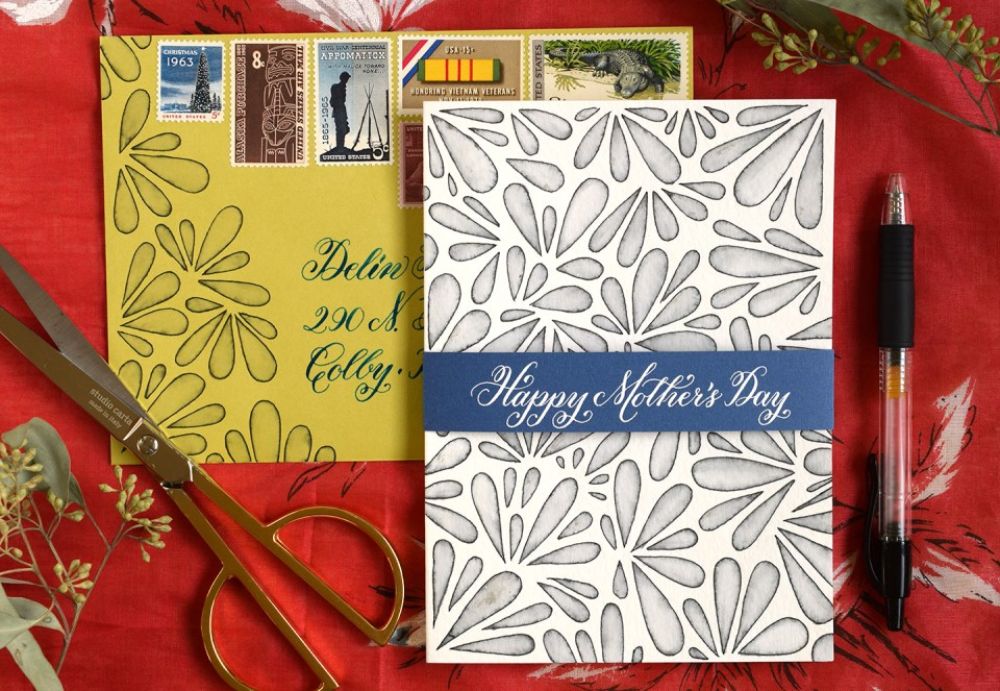
The occasion does not seem complete if there is no greeting card. The greeting cards are the best things for any occasion. Be it a birthday, festivals, wedding, anniversaries or special days like mother’s day or father’s day. They are all suitable enough to match the occasion.
A beautiful greeting card always has one essential component to it. And that is the type of paper used during its making. A good paper is ideal for creating a customized greeting card at home. To make a greeting card, simply fold a paper into two halves. You should use a ruler or a bone folder to fold the paper into halves to get a clear cut fold. Decide the front text and the inside text to go in the card.
Let us make a Christmas card with calligraphy at home. Find a thick piece of paper and fold it in half. If the paper is not colored, decide if you want it colored. In that case, paint the paper with the color of your choice and let it dry. Once it has dried up, decide the text on the card and the text that goes in the card. Get your calligraphy kit out and decide the font type, the color of the fonts and the message for the face of the greeting card. As this is a Christmas card, we are going to write Merry Christmas on the card. Once you have decided the fonts, start writing the greeting on the card with a bleed proof ink that is in contrast with the color of the card. Once you have written, let it dry completely.
Meanwhile, decide upon the message that goes inside the greeting card. Decide where will you put punctuations and where will the line break. Check that the ink on the face of the card has completely dried up. Now you can start writing the message inside of the card. Let that dry out completely. Before you can put the card in the envelope, make sure everything has dried up and is smudge-free. Write down your name and the name of the receiver in the place of the card. Your greeting card is ready to be sent.
Conclusion:
Calligraphy makes much difference to whatever it applies. These days calligraphy is done to whatever objects need customization. Calligraphy comes from Latin and Greek lettering techniques. It is an art of beautiful writing and scripting, which made the text look more attractive and appealing to the reader. Initially, the calligraphy was done entirely with hands, but now it is possible to print designer fonts digitally.
Calligraphy originally was used only for books and certain types of texts. Still, nowadays, it is widely used for modern advertising, designing flyers, visiting cards, logo design (as we saw previously) and so many other fields. Artists are encouraged to develop their lettering styles and calligraphic fonts. It has gradually has given way for the fonts to evolve. Hence, it seems, calligraphy is the future of designer texts.
via https://ift.tt/2UfJZcf

No comments:
Post a Comment