Canva is an online design tool. It offers users the opportunity to create professional-looking posters. It is used to create various images – such as event flyers, resumes, cards, certificates, and infographics. This tool is great for allowing students to showcase their creative ideas.
There are many different types of fonts offered in Canva for free. It has million stock photos and text options you can choose from. Additionally, you can get a more custom design by importing your images from your documents to create more tailored content.
Canva is available to everyone to use. It is a free tool that doesn’t require much expertise to work with it. It is simple yet very effective.
What’s also great about Canva is that you can also get your custom design. You can import original photos, and create an even more innovative design. With these several steps, you can upload fonts to Canva and improve your design.
How To Upload A Font To Canva?
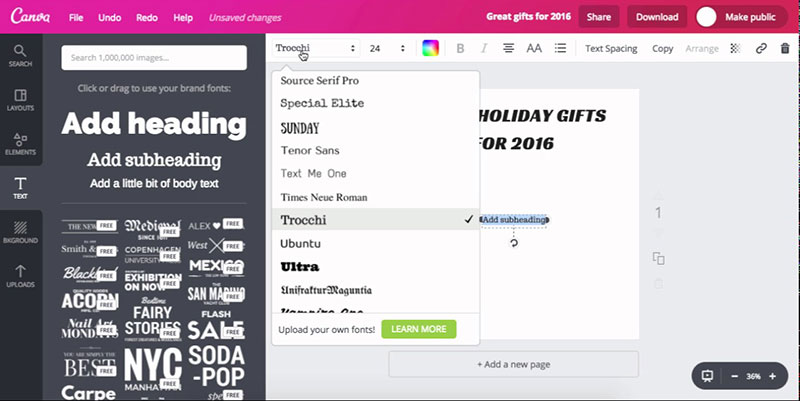
Having one font throughout your design will keep your work simple and cohesive. You may use already pre-made fonts, or you can add your own.
Before you can start uploading fonts to Canva, you first need to download a font. You may previously have the font you want to upload on your computer, but you can also use several sites to find amazing new fonts.
Saving Fonts To A Font Folder
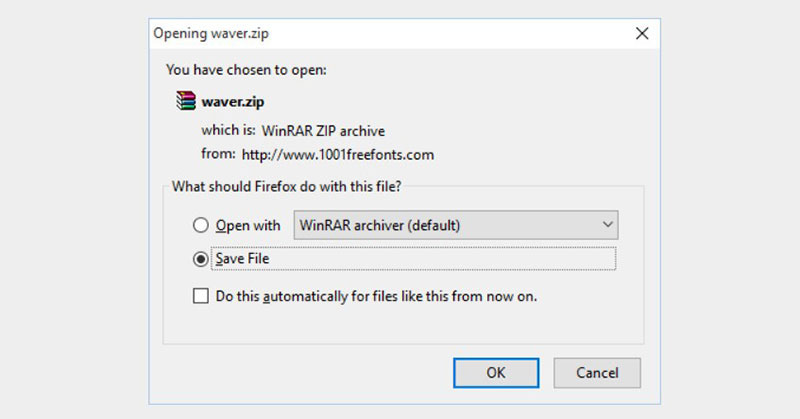
There are three steps on how to save a font:
- First, you need to download and unzip the fonts. Many fonts come in a zip file format, so extracting them from this format is the first step. You can do this by going to the font’s ZIP folder.
- At the top of the File Manager window, there is the Extract tab. Once you click this, a toolbar will appear.
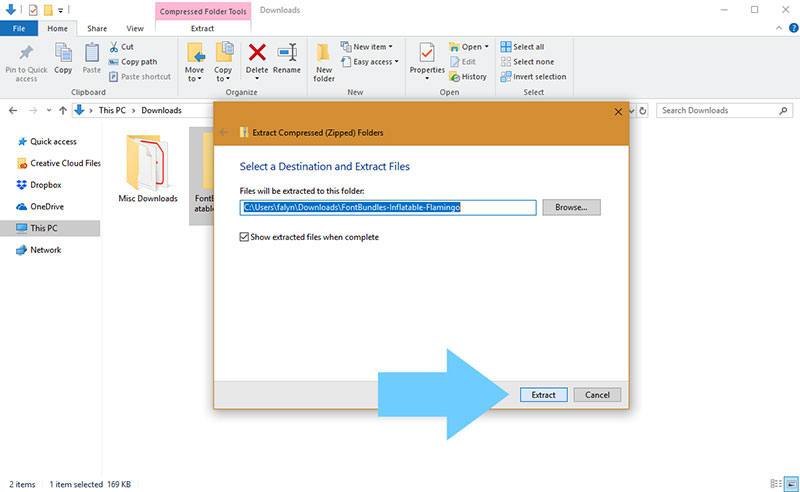
- The final step is waiting for the font file to extract. After it extracts, the font’s extracted folder should open – meaning that you can now interact with the font file.
Uploading A Font To Canva

- When you want to upload fonts to Canva, The first step is logging in. Once you’ve done that, open Canva and select the design type.
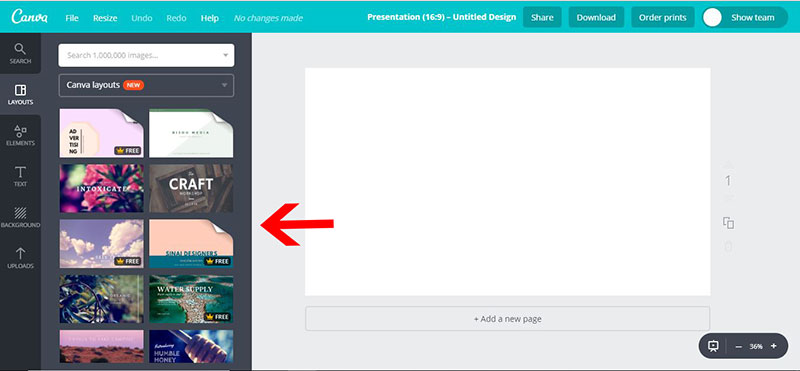
- Then, select the desired layout and click on the text icon. Click on the text box and then click on the font drop-down box. At the bottom of this text box, there is an option to upload your fonts. Click on it.
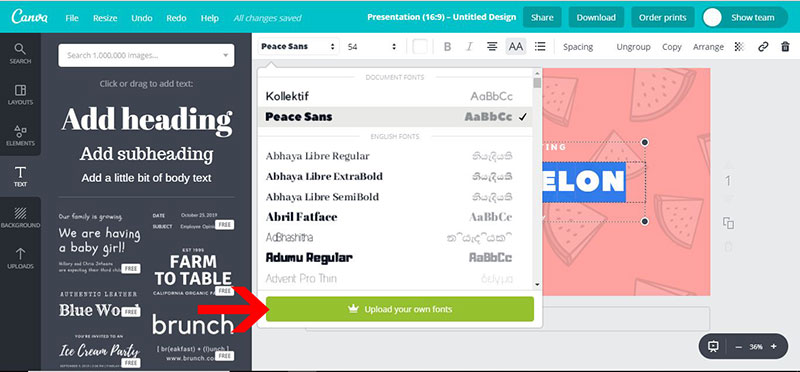
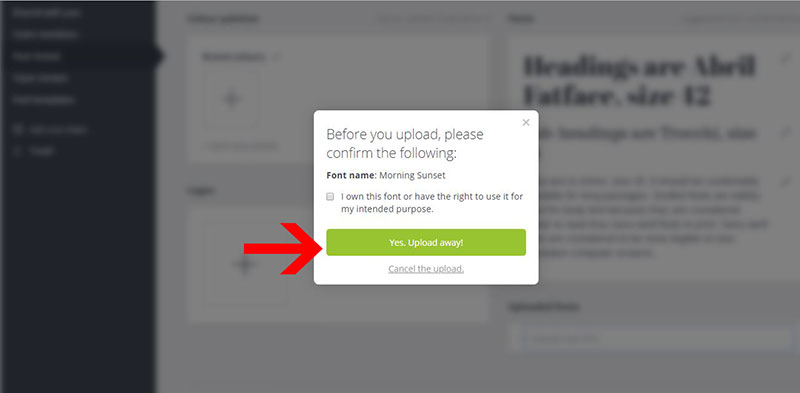
- After doing this, a browser window will open with the option to upload fonts. There, you can choose the wanted font. A popup will appear requesting you to confirm the uploading font.
- Then, all you need to do is select the design and text you’d like to use your font on. Now your font is in your Canva design.
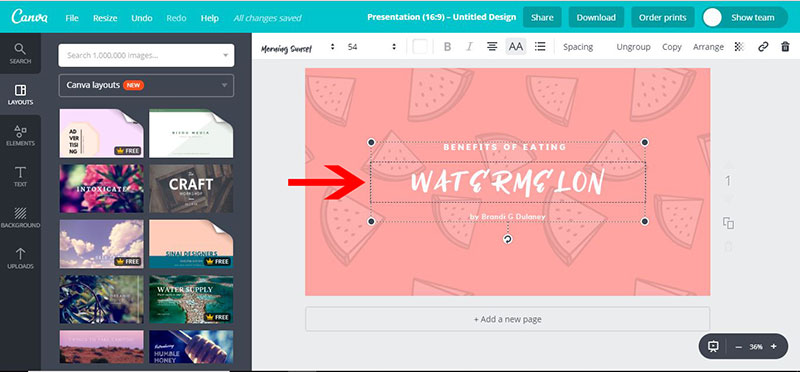
- You can change the size of the font by clicking on the pencil icon several times. However, you can’t bold or italicize the font since you only uploaded the one font style instead of the entire font family.
Uploading Fonts To Canva For Windows and Mac
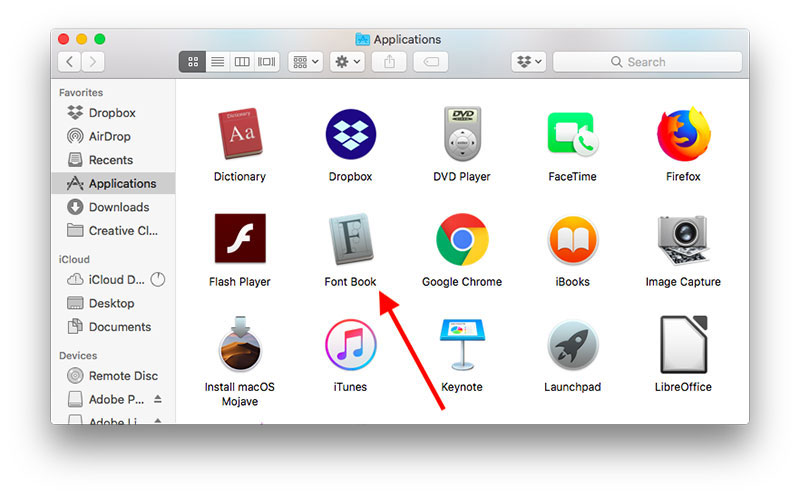
You may think it is tricky to save a font into different Operative Systems. However, you only need to do is follow these three easy steps and have the desired font uploaded:
- Once again, you need to log into your Canva account. For your Mac computer, you need to open Finder and then click on the applications folder. After you’ve done that, double click and open the Font Book folder.
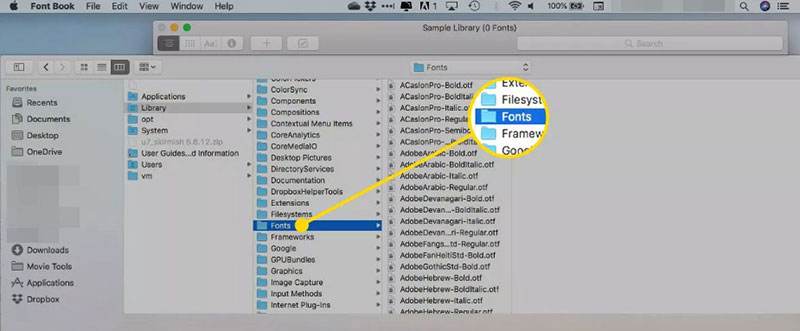
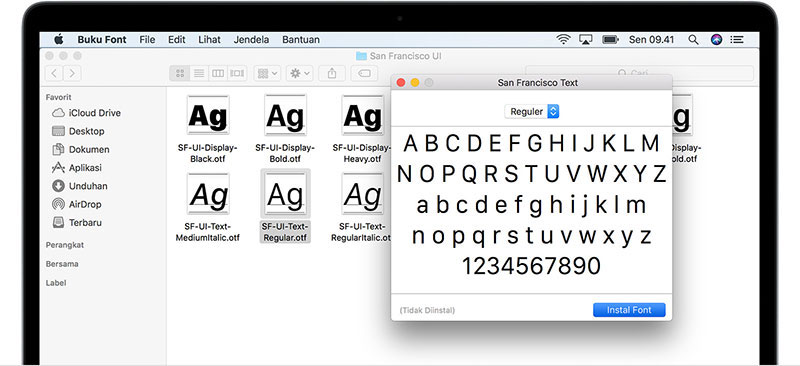
- A dialog box will emerge, and it will show you a list of fonts installed on your computer. Then duplicate and paste the font. At the bottom of the page, you will see the option for uploading a new font.
- A dialog box will appear again. It will ask you if you have the right to use the font. Since the font is automatically installed on your computer, it’s safe to use this font.
- To verify that the font uploaded accurately to Canva, design a new idea, or open an existing design. Then click the down pointer in the text area, and you’ll have a section says uploaded fonts. You should view the font you just added to Canva.
Uploading Custom Fonts to Canva Brand Kit
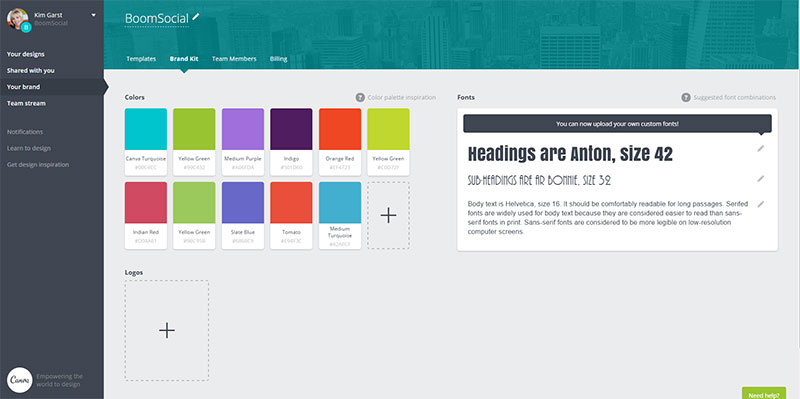
Canva Brand Kit lets you put all of your branding assets in one place so that you can keep your designs consistent. Canva Pro team owners, such as administrators and template designers, can upload hundreds of custom fonts to a Brand Kit. They can also set these as default fonts. This includes headings, sub-headings, and body fonts. No wonder their designs are something to be jealous of!
How to upload a custom font
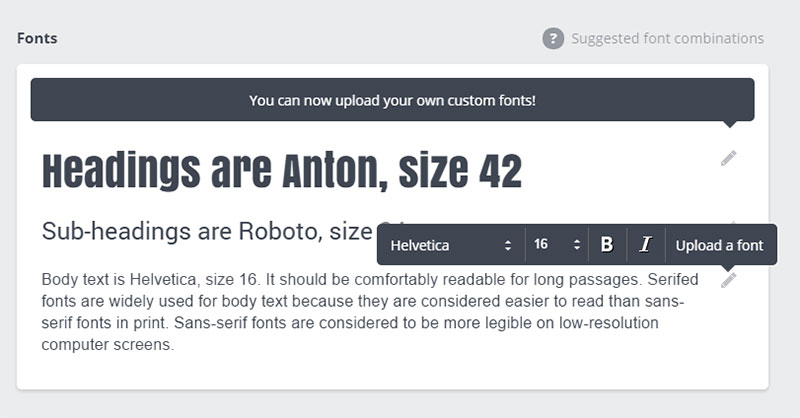
When you want to upload fonts to Canva, specifically custom fonts, you need to be log on to the correct team to access the right Brand Kit. Then, from the homepage, click Brand Kit in the left-hand side panel.
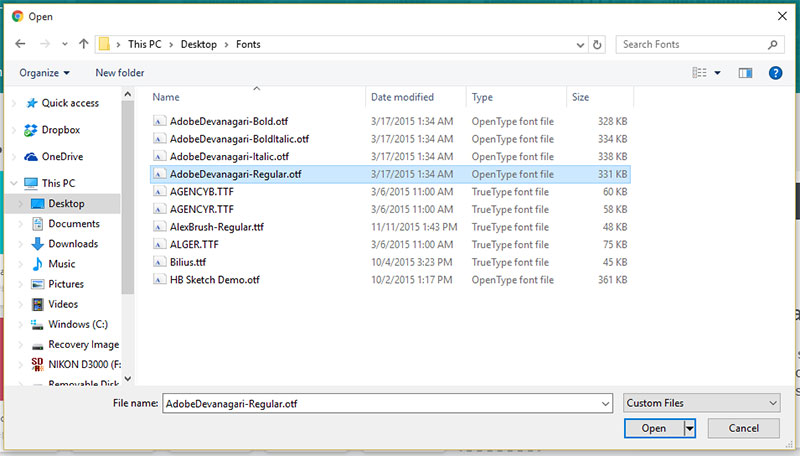
Then you need to click Upload a font and select the desired font. Just like before, a popup will ask for confirmation. And then, another popup to ask whether you have successfully uploaded the font.
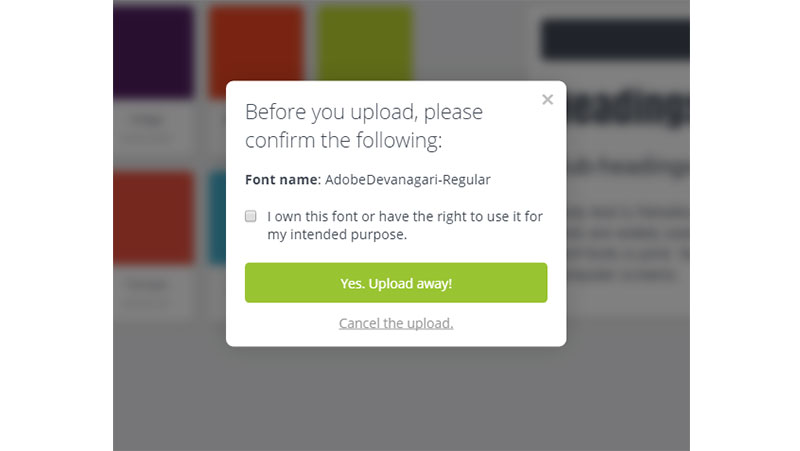
You may encounter an error message while uploading your design. If so, please make sure that you are using the correct font file format.
Tips for managing fonts
Once you upload fonts to Canva, you can manage them quite easily. But, it is best to create separate folders for your fonts. For example, you can separate the handwritten fronts from the other one. Another great idea is to install only the fonts you need and keep copies of them in the project folder.
Considerations when uploading fonts to Canva
Readability

If you want to upload fonts to Canva, you must make sure you choose the right fonts. It would help if you chose fonts that are easily readable to the audience. Even if your presentation is fun, vibrant, and thematic, the font must be easily readable from all distances.
Consistency
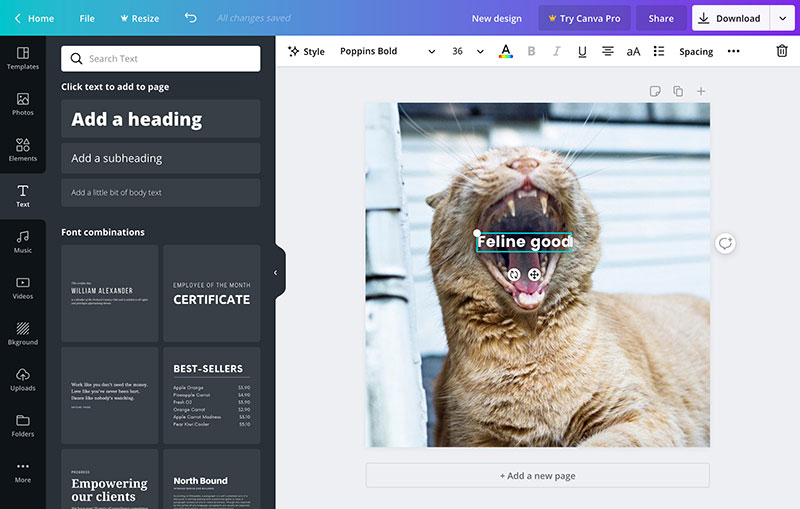
Consistency is essential, as well. It would be best if you stick to once font. Changing fonts often confuses and distracts readers. The best fonts are of standard style. By following these tips, you can upload fonts to Canva and step up your design game.
If you enjoyed reading this article on upload fonts to Canva, you should read these as well:
- How to add fonts to Paint.NET quickly and with no effort
- How to add fonts to GIMP (Fonts installing guide)
- How to add fonts to InDesign and use them in your projects
The post How To Upload Fonts To Canva In a few quick steps appeared first on Design your way.
Source: https://ift.tt/3jB3iHS

No comments:
Post a Comment