Photoshop is one of the most known and used software for photo editing and other graphical requirements. It has tons of options for image correction, editing and other related activities. One such feature Adobe Photoshop has is its Photoshop Replace Color feature. As the name suggests, the Photoshop Replace Color feature allows the user to replace the colors of the objects in a picture.
The Replace Color feature works similarly to the Background Eraser tool from Photoshop. It uses the same method for detecting pixels in an image that need to be altered/changed. Background eraser just erases those pixels, whereas Replace color changes the color. Having said this, the replace color feature from Photoshop isn’t the most professional approach to change the colors of an image and doesn’t always give the best results. However, it is a quick and convenient method for simple tasks and gets the work done efficiently for such tasks. Here is a detailed tutorial on how to use the Photoshop Color Tutorial effectively:
1. Select the Replace Color Tool:
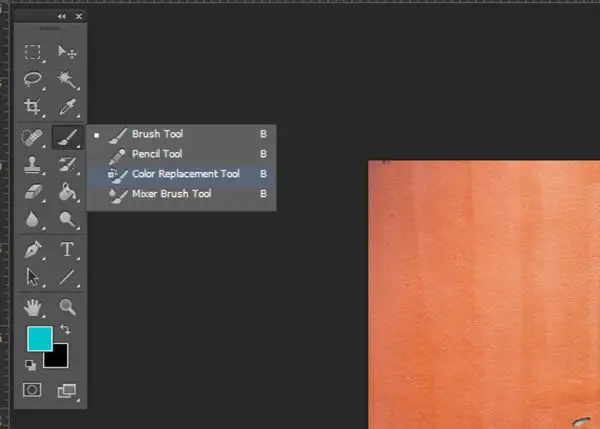
You can access The Color Replacement tool by clicking the Brush Tool icon, from the Tools panel. To get to the replacement color tool, you can right-click the Brush tool and choose the Color Replacement Tool, when the popup menu appears. Once you select the color replacement tool, the mouse cursor would change in a circular shape with a central crosshair. This cursor is similar to the cursor you would get when you select the background eraser tool.
2. Brush size adjustments:

The image you are dealing with could have a large section of the color you want to change. For instance, the color of the sky needs to be changed. Here if the brush size is big, you would be able to cover more area in a shorter time easily. However, if the color you want to change is minute and requires more accuracy, the brush size would need to be smaller and more refined. Hence having the flexibility of changing sizes of the brush is essential.
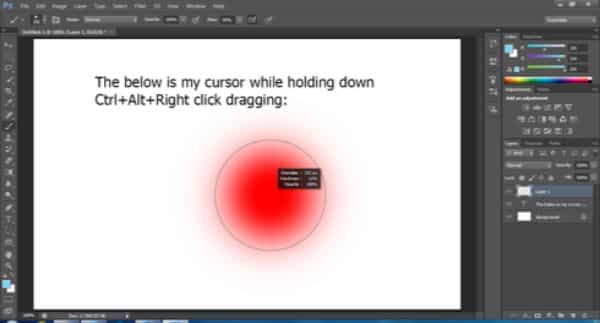
When you pull the Color Replacement tool over an image, Photoshop would continuously sample any color under its crosshair that replaces it with the current foreground color. If you press the left side bracket key continuously, the cursor gets smaller, and if you press the right bracket key, it gets bigger. Another control you get over the color replacement tool is adjusting the hardness of the brush edges. To do this, press the shift key with the left bracket key to soften the edges, and shift with the right side bracket key to make them harder.
3. Understanding the functioning of Replacement Color Tool:

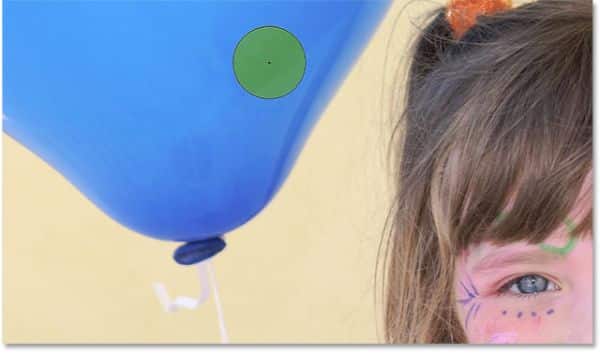
The basic functioning of the replacement tool is such that when you move the tool over a part of your image, Photoshop would continually sample the color that is right under the crosshair of the centre portion of the cursor. Hence it would replace this color with the color you have set as your foreground color. Also, any pixel of that original color that gets covered in the cursor’s range would be changed to the foregrounds color. For instance, you can pass the crosshair over an area of the image with the color blue in the photo. If the foreground is set to green, any pixels under the cursor that are blue would atomically convert to green. To check the foreground color, you can check it in the color swatch situated in the tools panel, bottom portion.
4. Adjusting tolerance for edges:

The process is relatively easy when you’re covering such a large subject by pressing down the mouse key and dragging the foreground color over the color you want to change. However if you zoom in to the object you are changing the color for, you can notice the edges of the object would have a blurry blue line that the Photoshop Replace Color tool is not picking up and changing.
Here we make use of the different options for customization available for replacing color tool. The tolerance level for the brush is 30 percent as default. However, if you need to work on edges, you might want to increase this value to 50 per cent. Now the tool would be able to manipulate a broader range of colors. Now if we color the blue balloon again with the changed tolerance settings, you would see that there is no blurry blue line that remains once we are done replacing the color with green. However ensure you use one tolerance level throughout the object, first doing it with 30 percent and just the edges with 50 percent might result in irregularities of the color shades, hence start over with 50 percent tolerance.
5. How to Sample Colors from the picture itself:

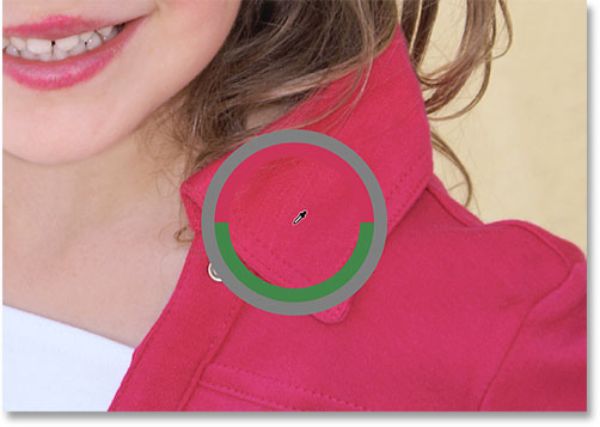
Many times it is possible that you want to replicate the color from a different area of the photo itself, and not use a new color from the color palate. For doing this, select the Replace Color Tool and press the alt button on the keyboard. This would temporarily activate the eyedropper tool. Now select the area which has the color you want to use for replacing the other color. This would change your foreground color to the color you just selected. Now let go of the alt button, and you would switch back to Photoshop Replace Color Tool. Since the foreground color has changed to the color you selected earlier; now you can easily replace the area you want to change color for like you would typically do. Hence now, the balloon is pink since we selected the color from the girl’s jacket.
6. Understanding the different blend modes in the Replace Color Tool:

You might have noticed by now, that both the times we changed the color of the balloon, the shine and reflective nature of the color remained intact. Had we used the basic brush tool and changed the color, the balloon would have had a flat color overlay, with no life in it whatsoever. This is because the Replace Color Tool comes with various blend modes that allow it to retain such characteristics of the area we change color for. Four parameters can be changed in Replace Color Tool- Color, Luminosity, Hue and Saturation. To choose between these, go to the Options bar. The default mode would be set to Color.
Any image makes use of Hue, Saturation and brightness as far as the colour of a particular object is taken into consideration. Each blend mode available in Replace Color Tool affects one or more such property of color. The Hue blend mode changes the primary color of the object. It wouldn’t alter the brightness or saturation of the original color. This is ideal for images with colors that aren’t too intense, and subtle changes need to be made. The saturation blend mode, on the other hand, would change the saturation of the color without affecting the Hue and Brightness. This helps to reduce the color’s intensity or to remove a color entirely if needed.
Color blend mode is the default setting mode that affects both the hue and saturation of an image. It still wouldn’t affect the brightness of the image. Lastly, luminosity blend mode would bridge the gap between the brightness of the previous color to the brightness of the new color. It would not affect the saturation or the hue of the image.
7. Using the Sampling Options in the Replace Color Tutorial:

When you have the options pop up menu opened, you would be able to see there are three small icons right next to blend mode options. All three icons are different forms of sampling method for the Color Replacement tool. The three options are Continuous, Background Swatch and Once. You can click between the three sampling options to switch between them.
These sampling method options help Photoshop control how it samples colors in the image when crosshair moves over them. Continous sampling method would make Photoshop keep looking for new colors to replace as the Color Replacement tool would be dragged around. Any color that comes under the crosshair would become the new color to be replaced. Such a setting is ideal for projects where the image has many colors in the object you want to change color for.
Once sampling tool would only sample the color, click on initially no matter how many of the other colors the cursor drags over. This is the best sampling method for filling a large area of a solid color. It is also a great alternative for continuous replace colour tool if using continuous is leading to much bleeding into nearby areas. Lastly, the Background Swatch sampling method would replace the color that is set as a background color currently. This is an ideal sampling method when the other two methods don’t seem to be working for your requirement. You can click on the background color swatch from the tools panel and then select a color by using the color picker that matches the color you want to replace in the image. If both the colors have a visible difference in shade, try increasing the tolerance level to reduce the gap.
8. Using Limits aspect of the Replace Color Tool:

This works similar to the Replace Color Tool. This tool controls the places Photoshop can look for colors for replacing process. It comes with three modes- Contagious, Discontiguous, and Find Edges. Contagious is the default setting. If you use this, the Color Replacement Tool would only be able to change the pixels that are in the same area of the crosshair’s central area where the cursor is touching. It wouldn’t affect the matching pixels of the sampled colors that are blocked by an area that has a different color.
The discontiguous mode would allow the color replacement tool to replace any color and any pixel that matches the sample color and is under the area of the cursor. It doesn’t matter if the pixels are in the same area as the crosshair or not. Lastly, the Find Edges option is very similar to Contagious tool when it comes to the aspect that it can only change the color of the pixels in the same area as the crosshair. However, it is more accurate at detecting edges. There can be a sharp and well-defined object that the Color Replacement tool is having difficulty with. Using tolerance settings isn’t helping either. Here, Find Edges would be a great solution.
These were the 8 essential steps and considerations for using Photoshop Replace Color tool. This tutorial covered the important aspects of using each of the elements of the Replace Color tool for getting the desired results. Each project and object has different characteristic and requirements, hence making necessary changes to the blend modes, sampling methods and limit aspects become essential to get the right feel of the replaced color, to match the client’s requirement. Make sure you practice changing the colors enough with each style to understand their relevance and where to use what.
The post Photoshop Replace Color Tutorial appeared first on Line25.
Source: https://ift.tt/2tnSaJ8


No comments:
Post a Comment