Adobe Photoshop is one of the most used software for editing professional pictures and manipulating them for getting the best outcome possible. The possibilities of manipulation and editing are endless when it comes to Photoshop. One of the most useful skills that you can learn in Photoshop is how to remove the background from an image. There are endless possibilities of what can be done with the image once it’s separated from the unwanted background. There are a few methods to remove the background of an image depending on how complex the background of a particular image is.
In this tutorial, we discuss four such methods from the easiest to the most complex to quickly and easily remove a background from a photo or image using Adobe Photoshop.
Method 1: The Magic Wand Tool
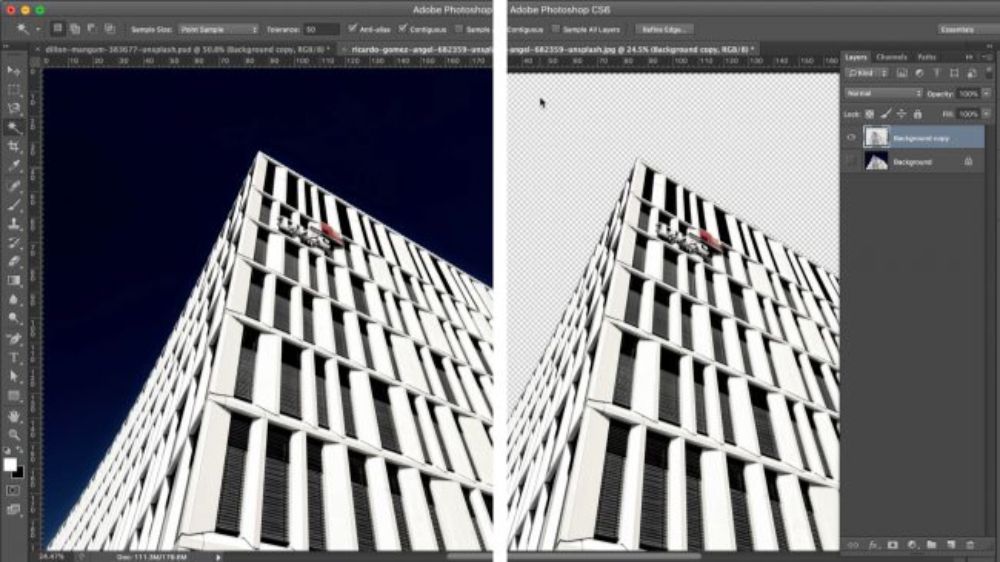
As the name suggests, using the Magic Wand Tool is one of the quickest and easiest methods for removing background in Photoshop. This method requires that the image you have has clearly defined edges, to work correctly. It works best when there’s a right amount of contrast between the foreground and the background and also when one of these elements is a solid flat colour.
Step 1. Make the basic selection:
Before you start, open your image and duplicate it. Now hide it in the background layer. This helps for referring back to the original image if needed. Now select the new layer, and pick the Magic Wand Tool from the tool panel. Shortcut for accessing the tool is ‘w’ and ‘shift+w’ to toggle between the tools. Now after selecting the tool, select the flatter area of the image and delete it.
Step 2. Manipulating Tolerance Levels:
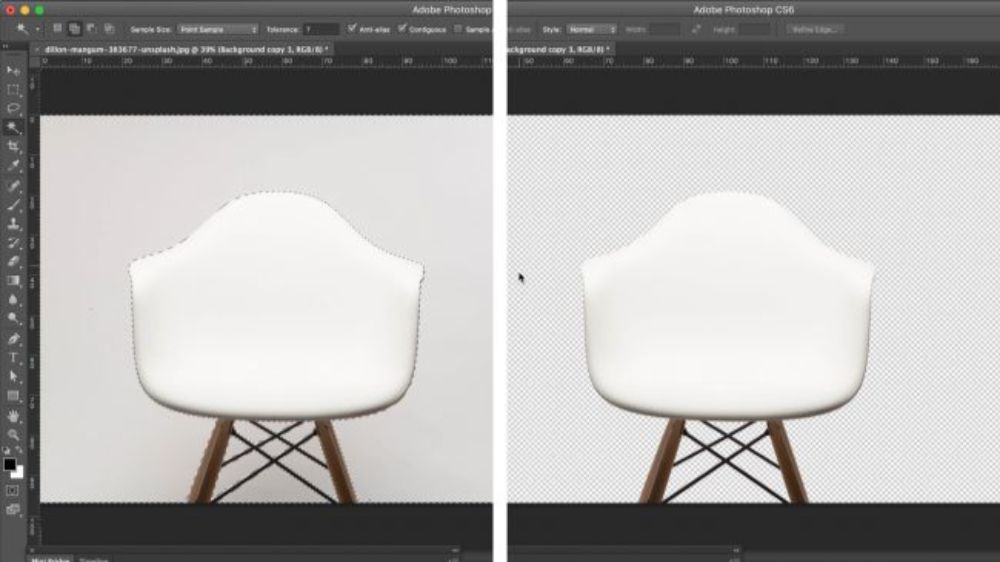
The Magic Wand alone can only help to remove a background from an image till a limit. However, you can get around trickier pictures provided they still have sharp edges, by manipulating the tolerance levels of the image. The tolerance settings are situated in the options menu. It adjusts the range of colour values you want to manipulate at once. Increasing the colour value increases the range of colours, and decreasing it selects a narrower range.
For images like the one above, the foreground and the background has a very similar colour which can make it difficult to distinguish both from each other. For this, you need to use lower tolerance levels so that the Magic Wand tool can easily recognize the background as a separate colour. Then by using the Magic Wand tool and the shift key together to select different areas of the background until you cover the majority of it.
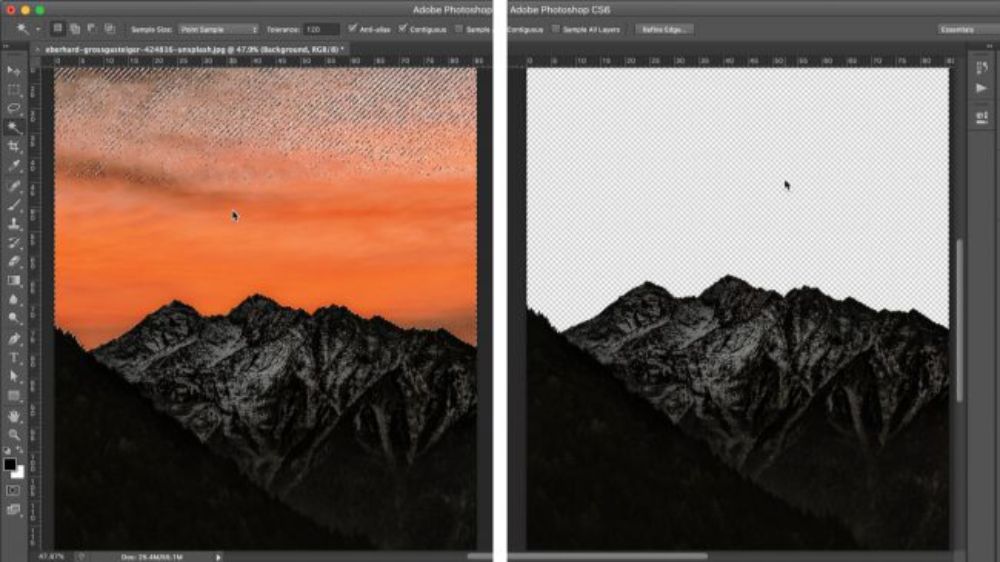
In contrast, when you have an image like this in hand that has many different colours in the background but has a bright contrast between the background and the foreground, you need to increase the Tolerance Levels. The dark mountains are set against an orange sunset; hence, the tolerance level needs to increase for a clear distinction between the foreground and the background. After this repeat, the process of taking the Magic Wand Tool with shift and keep selecting the unselected parts of the sky (background) until all of it is selected.
Step 3. Use Layer Masks to neaten things up:
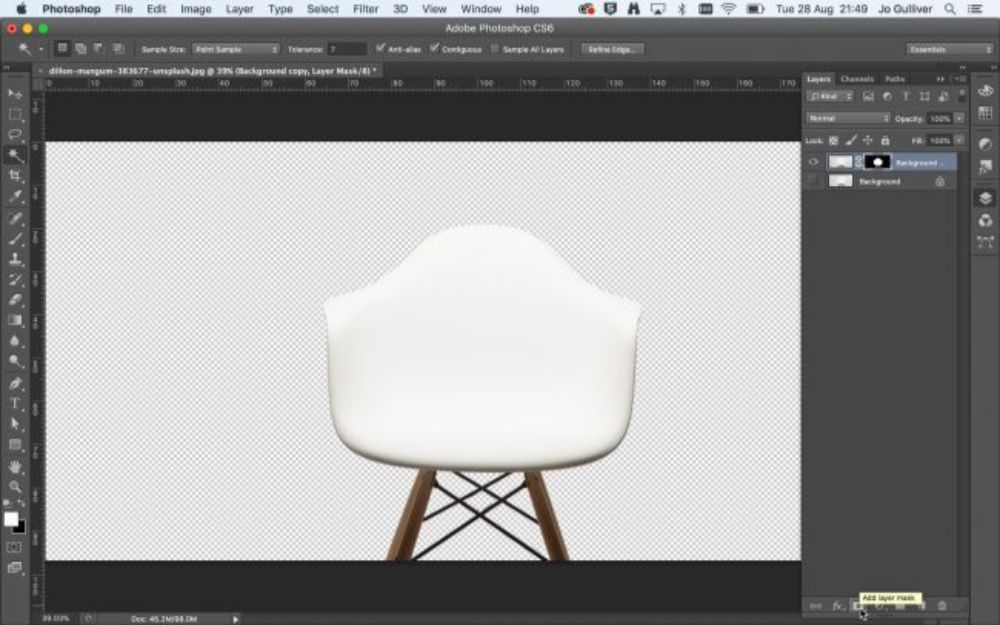
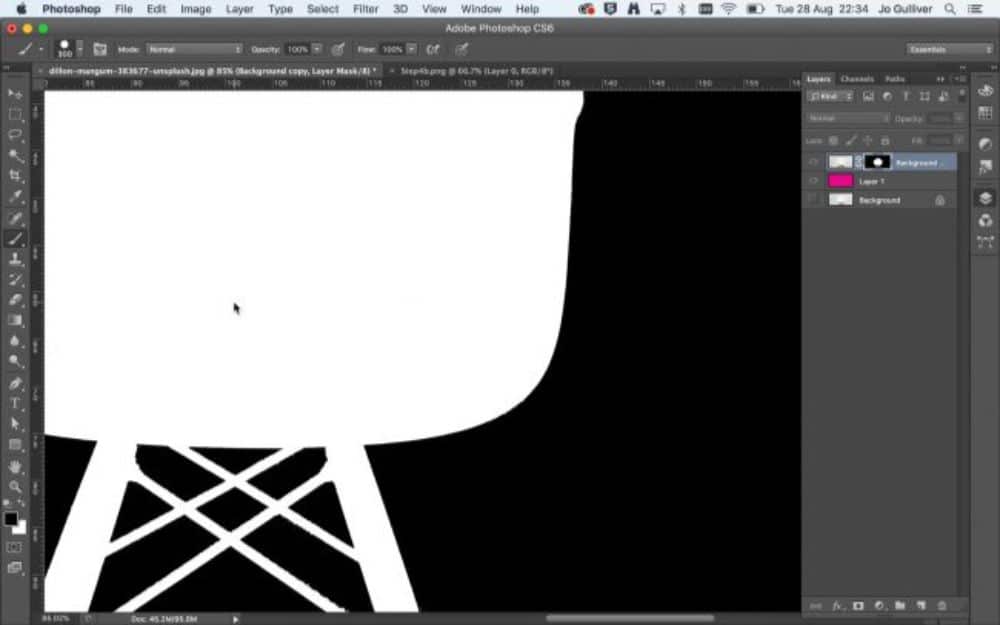
The Magic Wand tool sure gives you a quick cutout; however, it isn’t the cleanest when it comes to the edges. Also, if you’re making multiple selections, chances are you might have left some stray pixels in the background that can look untidy and unprofessional. If we refer to the chair in step 2, repeat the process till selecting the area with Magic Wand Tool and setting the Tolerance accordingly. Now instead of deleting the selection create a mask. For this, you need to invert your selection through the command ctrl++shift+l and then select the Add Layer Mask button situated at the bottom of the Layer Panel.
Using a mask when editing your image allows you to have more control over the image as it’s now nondestructive. This means the unwanted pixels are not deleted; they are just hidden. This allows you to re-edit the masks by repainting or removing in parts of the original image.
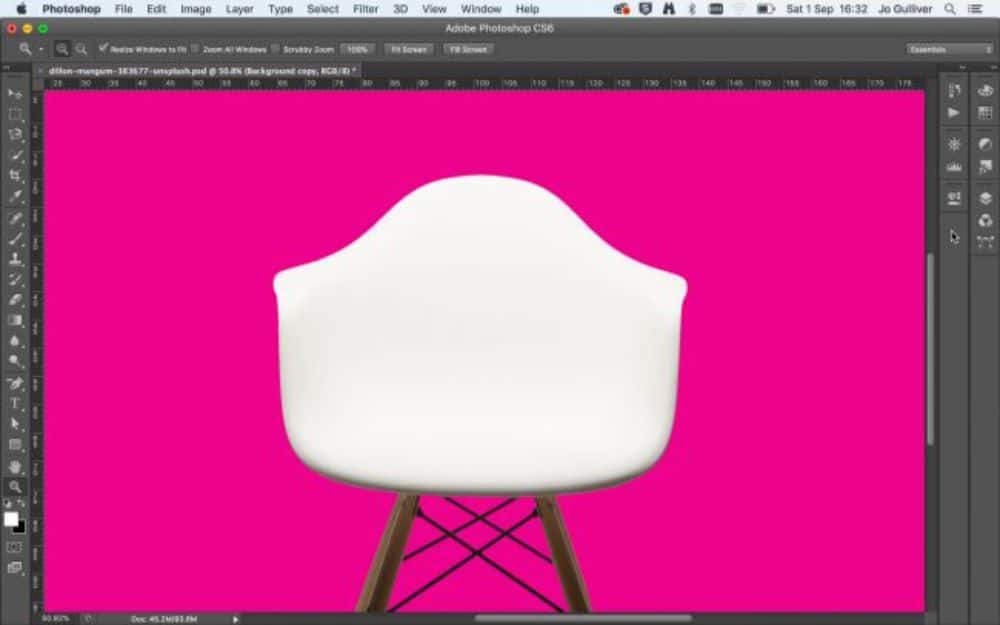
To review how neat your layers look, create a New Layer using the New Layer button. Fill this layer using a solid bright colour and then place it below your mask layer. By zooming in you can see the limitations of the Magic Wand Tool as the edges might still be very jagged and filled with lesser stray pixels.
Step 4. Tidy the image using Brush Tools:
Layer Masks allows you to clean up the image. The first thing to do is to get rid of any stray pixels that were not selected with the Magic Wand Tool. You can do this by alt-clicking on the Layer Mask thumbnail in the Layer Panel. Now set the foreground colour to black and select a paintbrush tool to start filling those stray pixels. Tidy up the edges of the image. You can use the “[ ] “buttons to decrease and increase the brush size for covering smaller or larger areas of the artboard.
Step 5. Finesse the Layer Mask:
Now click back on the background image to exit the Layer Mask view. Now reselect the Layer Mask thumbnail to activate it. Once this is done, take some time with the Brush tool to tidy up the image and get rid of any harsh edges.
Method 2: The Quick Selection Tool
The quick Selection tool is useful for making speedy cutouts. It works similarly to the Magic Wand Tool but a bit more efficiently as it just doesn’t capture similar colours, but also similar textures and detects the edges of the object better.
Step 1. Make a selection:
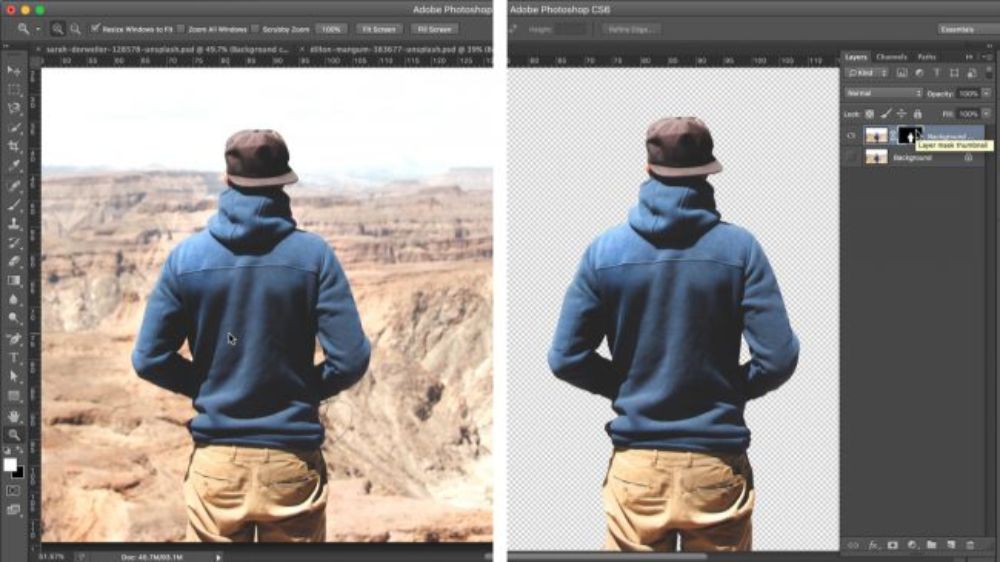
The starting is pretty similar to the first method. Import the image you want to work on, duplicate and hide the background layer. Now select the Quick Selection tool from Tools panel or using the shortcut w and shift+w to toggle between the tools. Click on the foreground subject and drag. The tool works best when you start from the centre of the object to wish to cut and drag it outwards.
If you accidentally select parts that you didn’t want to be included in your cutout, hold down the alt to remove these parts from your selection. Make use of the “[ ] “buttons to resize the brush to control how much area is being affected by the Quick Selection Tool.
Step 2. Soften the cutout edges:
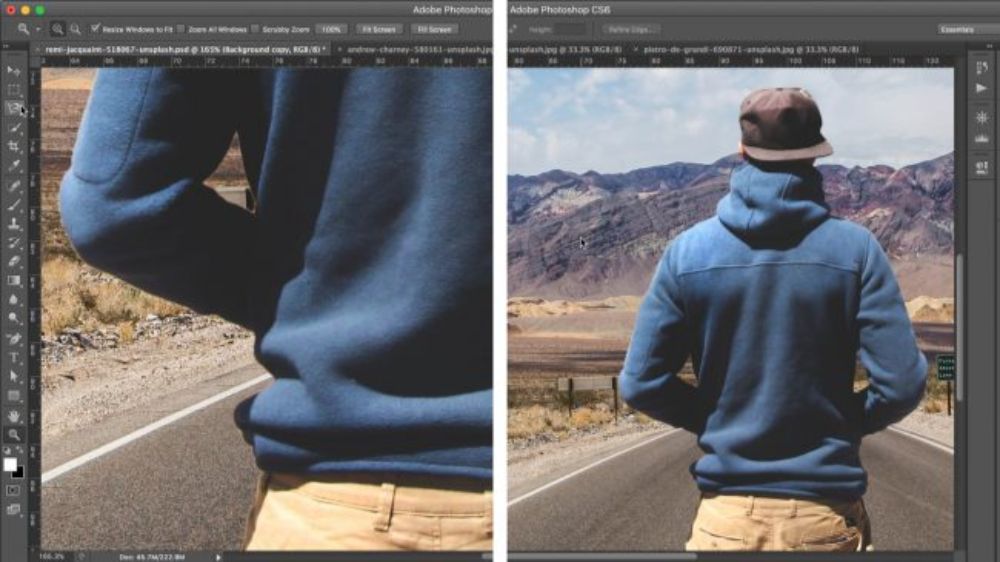
Now when you add a new background to your image, you might notice the cutout has a slight halo effect around the edges. This might look out of place, but you don’t need to worry as rectifying it is relatively simple. Just select the cutout by pressing control and left-click on the layer mask thumbnail. Go to Select menu > Modify> Contact while the layer is active. Now enter a value in the contract selection box for trimming off the edge of your image.
Now you need to add a feature by going to Select>Modify. Invert the selection. Now make sure you have the layer mask thumbnail selected, and then delete it. The cutout should have much softer edges that look much more natural on the new background.
Method 3: Work with Channels
Step 1. Getting Started with Channels using Levels:
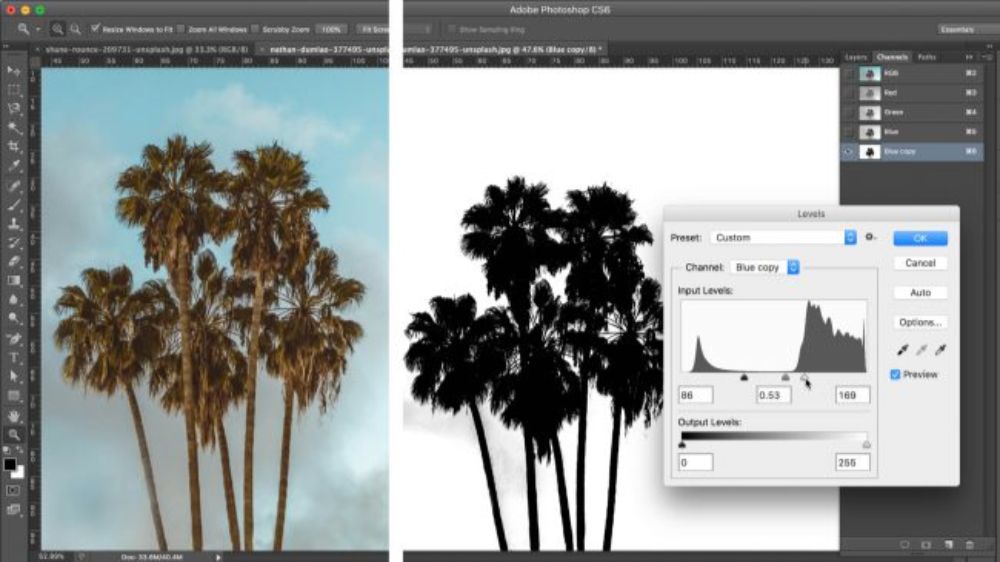
Start by opening the image that we want to cut. Now go to Channel panel. Browse through all the channels and find the one which has a high contrast to the present image. Duplicate this channel and go to the levels option (control + L). Now you need to adjust the settings to get the output.
Step 2. Clean up Image using Dodge and Burn Tools:
Look for any solid elements in the background and clean them using the Dodge and Burn tools. For the next steps, select the exposure tool and set it to around 100. Now using the doge tool, try and paint the areas that are not needed.
The burn tool is used for the exact opposite reason. Select the tool and darken the areas you need to. Keep doing this until you are satisfied with the visual image. After that, create a mask from the layer panel.
Step 3. Make use of the Refine Edge Tool:
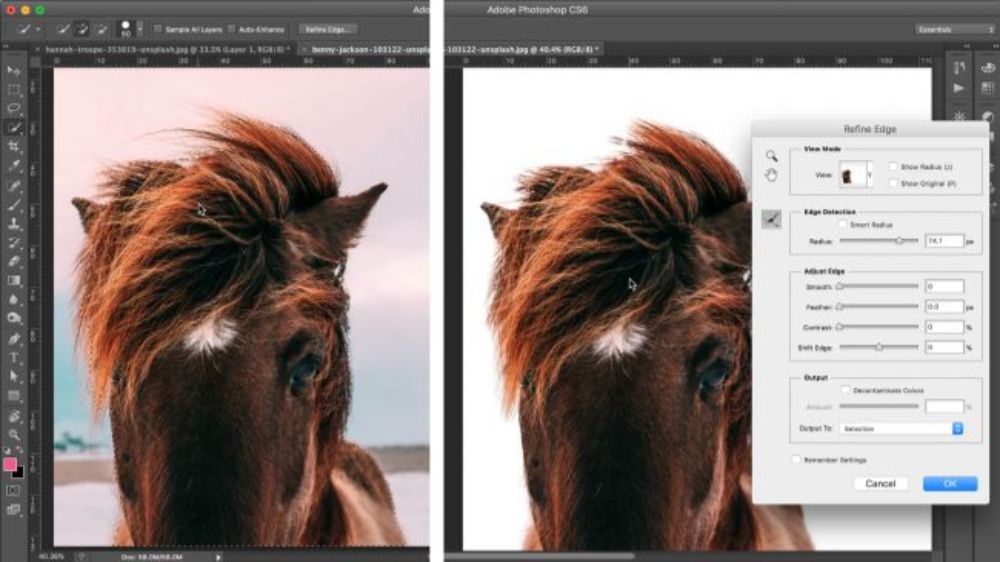
Images with finer details such as hair or fur need more efforts for cutting out the background. The Refine Edge tool helps in this purpose. For using this method, first, open the image. Now duplicate the image through the layers panel. Start with any tool for a rough cutout of the image. Right now do not stress over the finer details and just focus on the selection of objects that you want to keep. And don’t worry about the finer details just yet. Now with this rough selection active, go to the Refine Edge tool. Adjust the edge detection as per the requirement of the image.
Step 4. Restore Details:
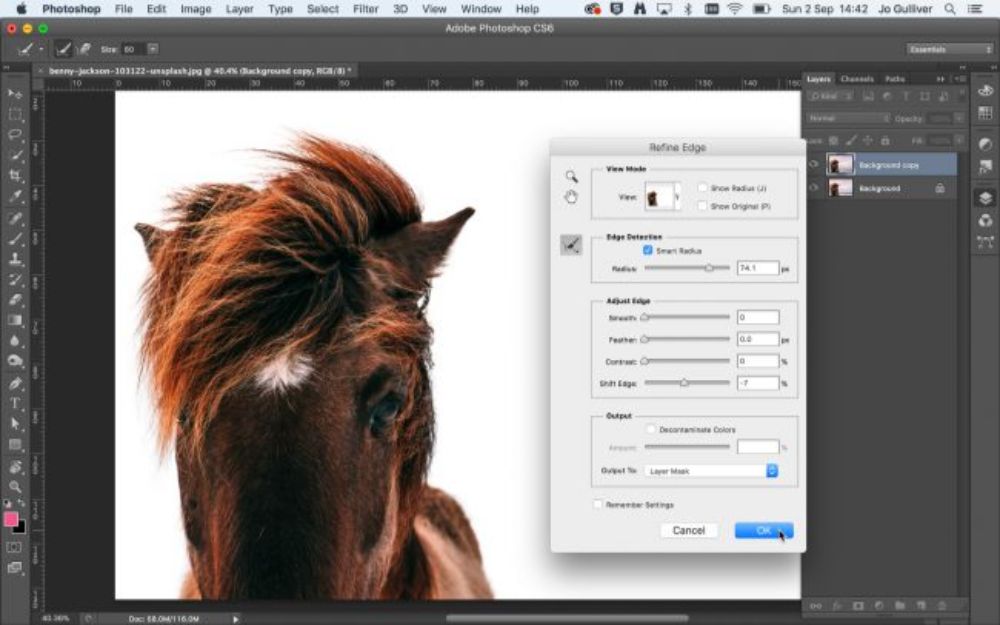
Even after the above step, you may want to have a better-edged image. For this use the Smart Radius option. Choose the Refine Radius Tool and now paint over the image in question. Focus on the edges where you want more details to come out. There is an Erase refinement tool which does exactly the opposite, that is, lowers the detailing of the image. There is also an Adjust Edge option which will give you further control of detailing the image. Using all these tools, you can adjust the image and reach your satisfied level. After that output the layer mask through the layers panel.
Method 4: The Pen Tool
All the tricks and techniques discussed as above can be very useful for removing the background using Photoshop. However, in order to achieve perfection and have a better output, you need to get familiar and practice using Pen Tool. The earlier discussed methods had an aim of convenience over perfection. This method is certainly more laborious and requires more practice before mastering the use of it.
Let’s systematically break it down, so it’s easier to comprehend.
Step 1. Start by Drawing a Path:
Open the image first, which needs the background to be removed. Now repeat the process that we have been following all the methods so far. Duplicate and hide the background layer. Once this is done, click on the Pen Tool to select it or use shortcut P. Now you will have to display your skills by drawing an entire path that you want to cut out. To make the path in a better way, you may want to create curves by using anchor points. Hold the mouse key and then click and drag to set the anchor points. This will allow you to set the curve just that way you want on the image. There are many options that you get on how to best use the anchor points; you can explore more of it to master this art.
Step 2. Saving The Path Created:
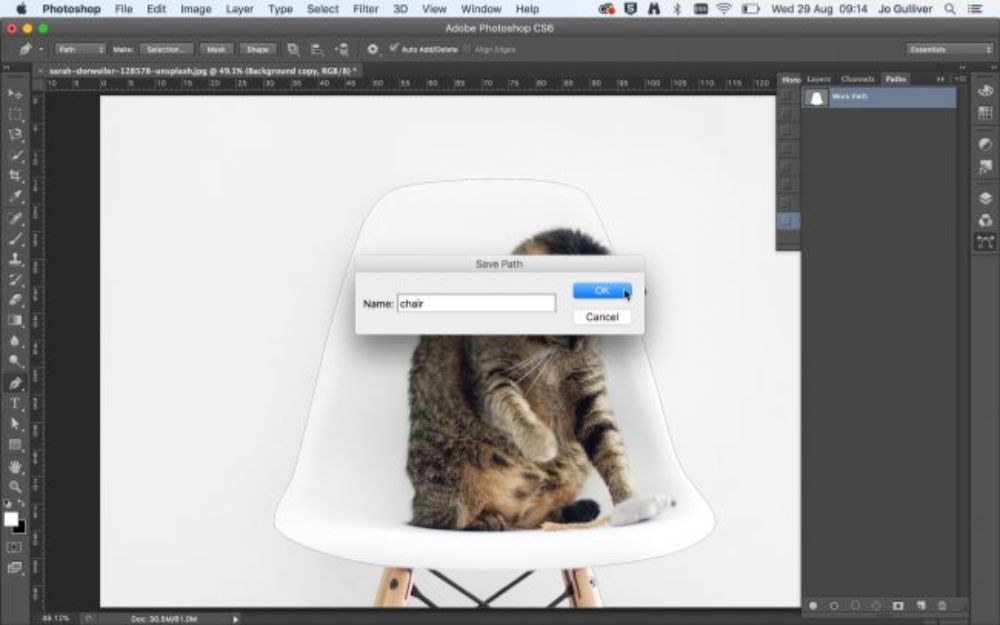
Once you are done tracing the foreground item and creating a path as per the requirement, we need to convert the path in shape by closing it. This can be easily done by clicking on the first anchor point that you had created. A small circle showing the option will appear on the screen. Once you click this circle, the path will be well closed. This path will then appear in Paths Panel under Window. You also have the option of naming this path by double-clicking on it. Giving all your paths names is a good practice as it helps you identify which ones you want to work on.
Step 3. Editing the Path:
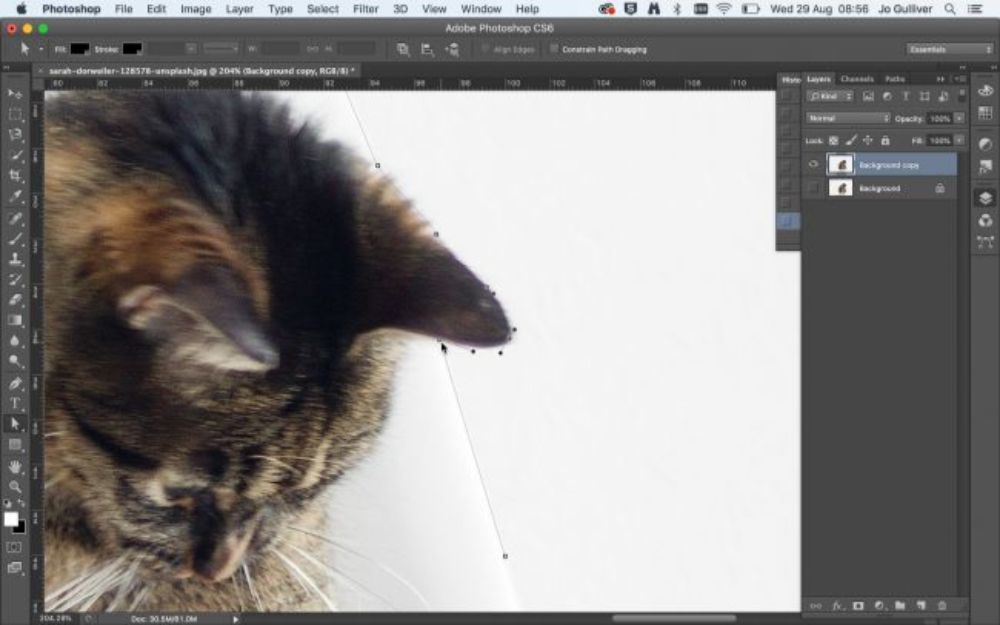
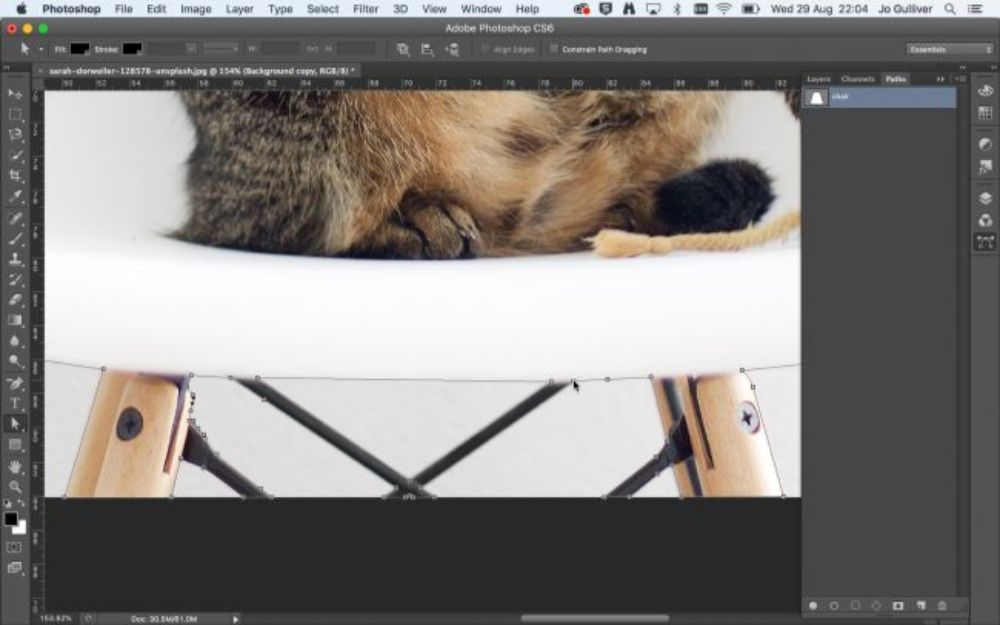
The most significant advantage of using a path is that you don’t need to have it perfect the first time. You always have the option of editing the path you have created. Over a period of time when you feel the curve is not right or the lines are not matching, then you can quickly edit the path by using the tool called direct select. Simply select the anchor point you want to edit and play around with the handles till you get what you need. You always have the option of adding or deleting anchor points as per need. This gives you the much-needed flexibility to get your path in the best shape possible.
Step 4. Converting the Path to Mask:
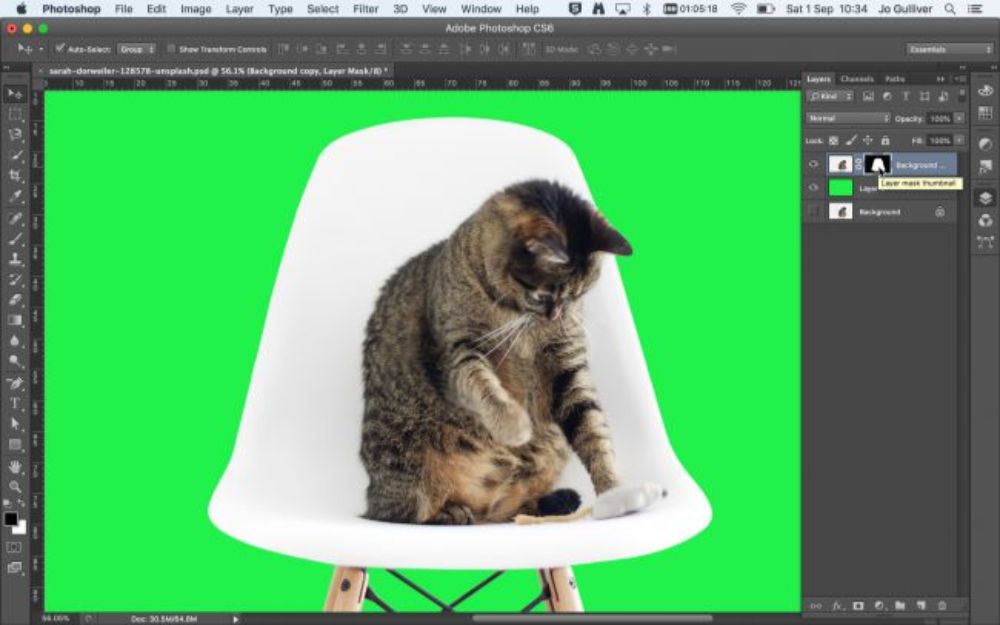
Once the path is created, we need to convert it into a layer. For this, you will select the path that we have created from the paths panel. Select the load path option. After doing this go the layers panel, and duplicate the layer. After this, opt for the Add layer Mask. Once this is done, you will have to create a new layer and add good bright or loud colour as the background to see how good the cutout has come out. As discussed earlier, the best advantage of using a Mask is that it allows you to use the hidden information again if needed. If the edges appear rough, you might want to soften the cutout.
These were the 4 ways to quickly remove a background from an image or photo using Photoshop which you can use for editing your next image.
The post 4 Methods to Quickly Remove a Background Using Photoshop appeared first on Web Design Blog | Magazine for Designers.
via https://ift.tt/35Grl0l


No comments:
Post a Comment