These days, web series and movies have taken up the market, and barely anyone reads a comic book. Because of the comics losing out on popularity, no one is printing comic books anymore. Inevitably, some tabloids print the comic strip, but these days, hardly anyone reads them. For instance, Marvel Avengers movie series from the comics has been a big hit. The era of comics dates back to 1930s. Coming to now, today, in this blog, we are going to look at the steps to create a retro style comic in Adobe Illustrator. We are going to see the steps where we start to develop a comic strip from the sketchbook and work towards creating artwork in Photoshop and Illustrator. You will also be able to develop your visuals and language that gives way to your style of writing and developing comic content.
We are going to look at the piece where we document the various people we meet on a day-to-day basis in London. So, this particular sequence focuses on someone called Mr DVD who earns his bread by selling pirate DVDs on Mare Street in Hackney.
1. Observation:
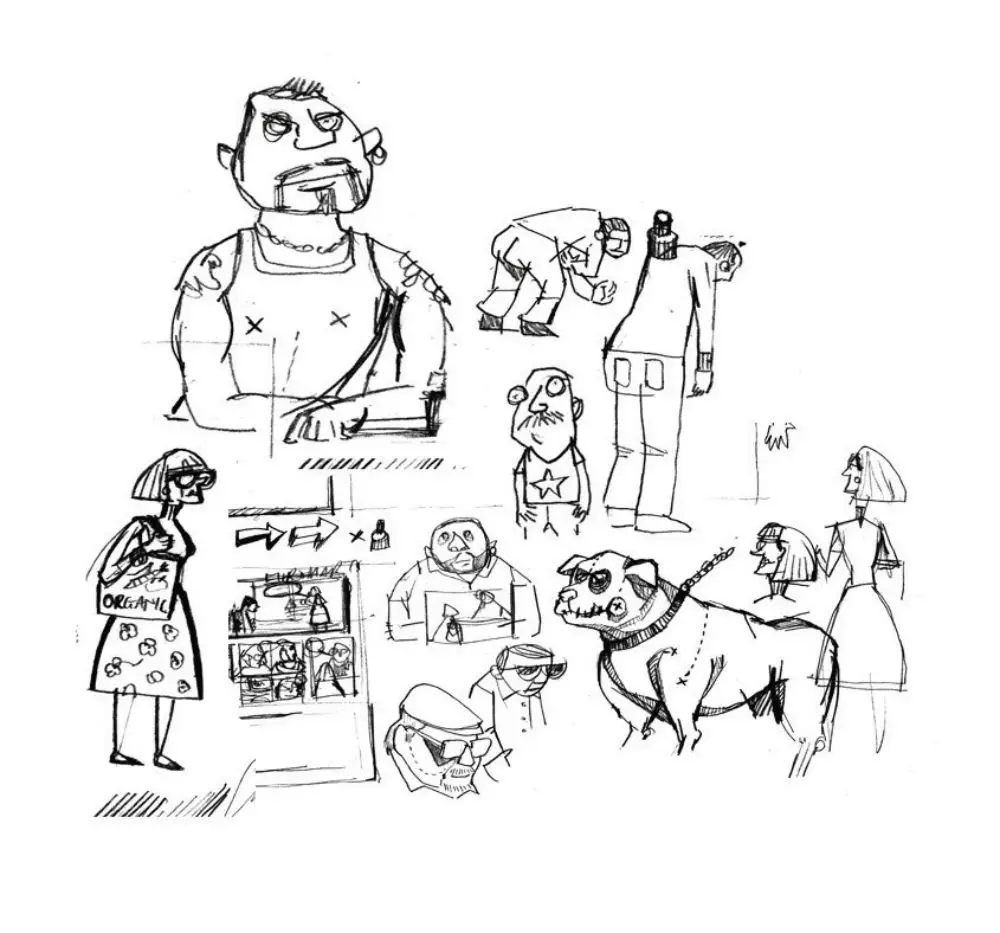
The most important skill when it comes to developing a retro style comic strip is observation. To develop a character, you have to observe the people around you. It is not necessary to follow only one person. Your character can be a mixture of characteristics from various people. Hence, to develop a distinct character, you have to observe the traits of one person or a bunch of people and bind all the characteristics to form a new person altogether.
A comic strip generally bases on the real-life people you come across. You marvel at the characters of your favorite comic book, but they could be one person in real. There’s also a possibility that the writer could have created a character by adopting different traits from a group of people. It’s the tiny details that make your comic strip come to life. You should keep a sketchbook along with you because it is difficult to remember every small detail that you come across.
While you focus on your character and draw an outline, you can also make notes of how that person behaves or talks or does things. Your observation towards tiny details and developing specific characteristics of your character gives you a unique identity. For instance, the way you draw someone’s hands or nose or hair can give you a lifelike confident character that you believe.
2. The character:
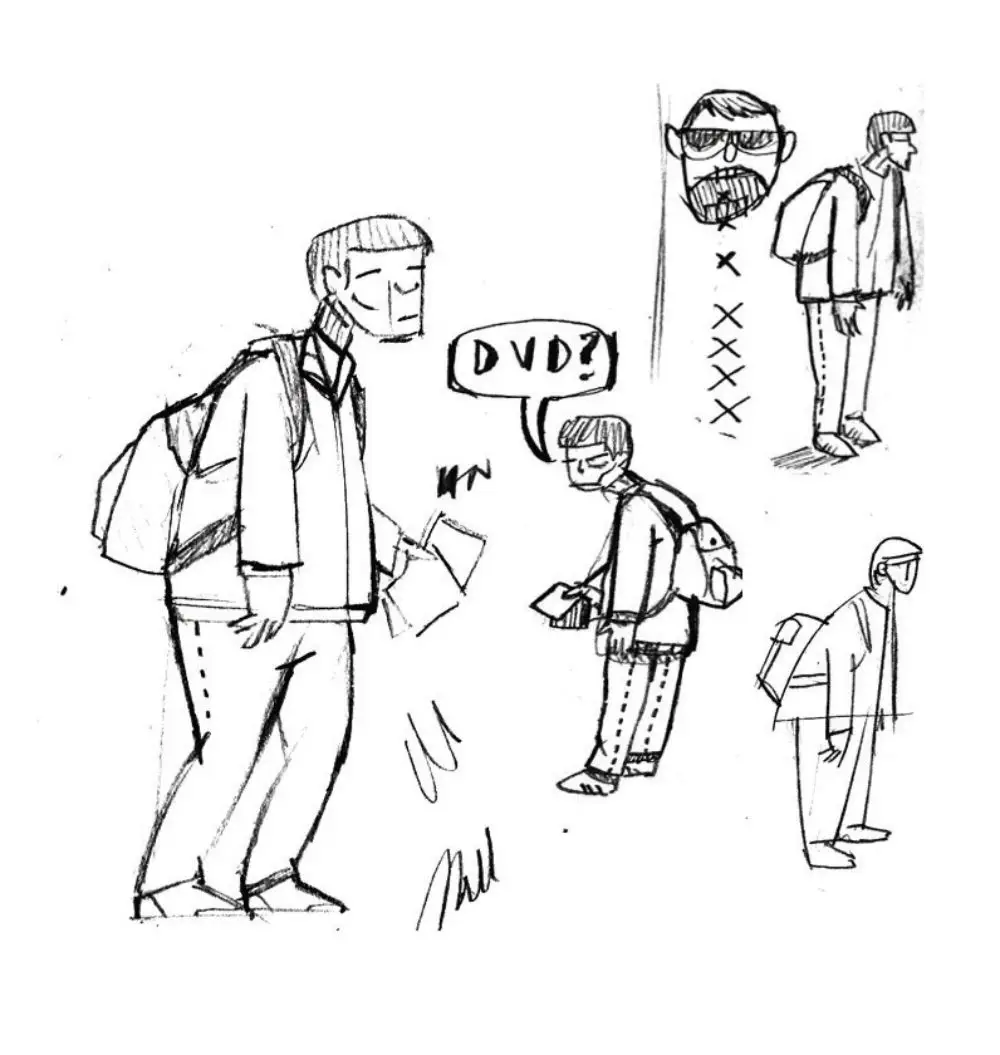
Whatever character you choose to develop, the character should be unique and should be able to set a rapport with the readers. The readers should be able to remember the traits of the character you develop and should be able to visualize the person in their minds. List out all the traits for each of the characters in the comic book with attention to detail. You should list out the characters and describe them in detail in each section to decide how the character of your comic book is going to look.
After developing their behavioral traits, you should work on the appearance of the character because the comic is based solely on appearance unless you write in the strip. The characters of your comic strip should look unique from each other. For instance, one character can have curly hair, a big nose and a bulky built while other character looks skinny that wears bell-bottom jeans with straight hair slicked with oil.
There can be animals or birds too, in the comic strip which would just add the real-life feel. You can envision the different breeds of the birds and animals that are available in our real world and use their traits while developing their character for the story.
In this case, our character is going to be Mr DVD, who sells pirate DVDs for a living. So, we have to watch this guy get an insight as to how he behaves. For instance, we take a look at how he typically stands when he interacts with people at Pubs and cafes to sell his DVDs. Hence, we can take into account his posture while we make a rough sketch of him in our sketchbook.
3. Sketching:
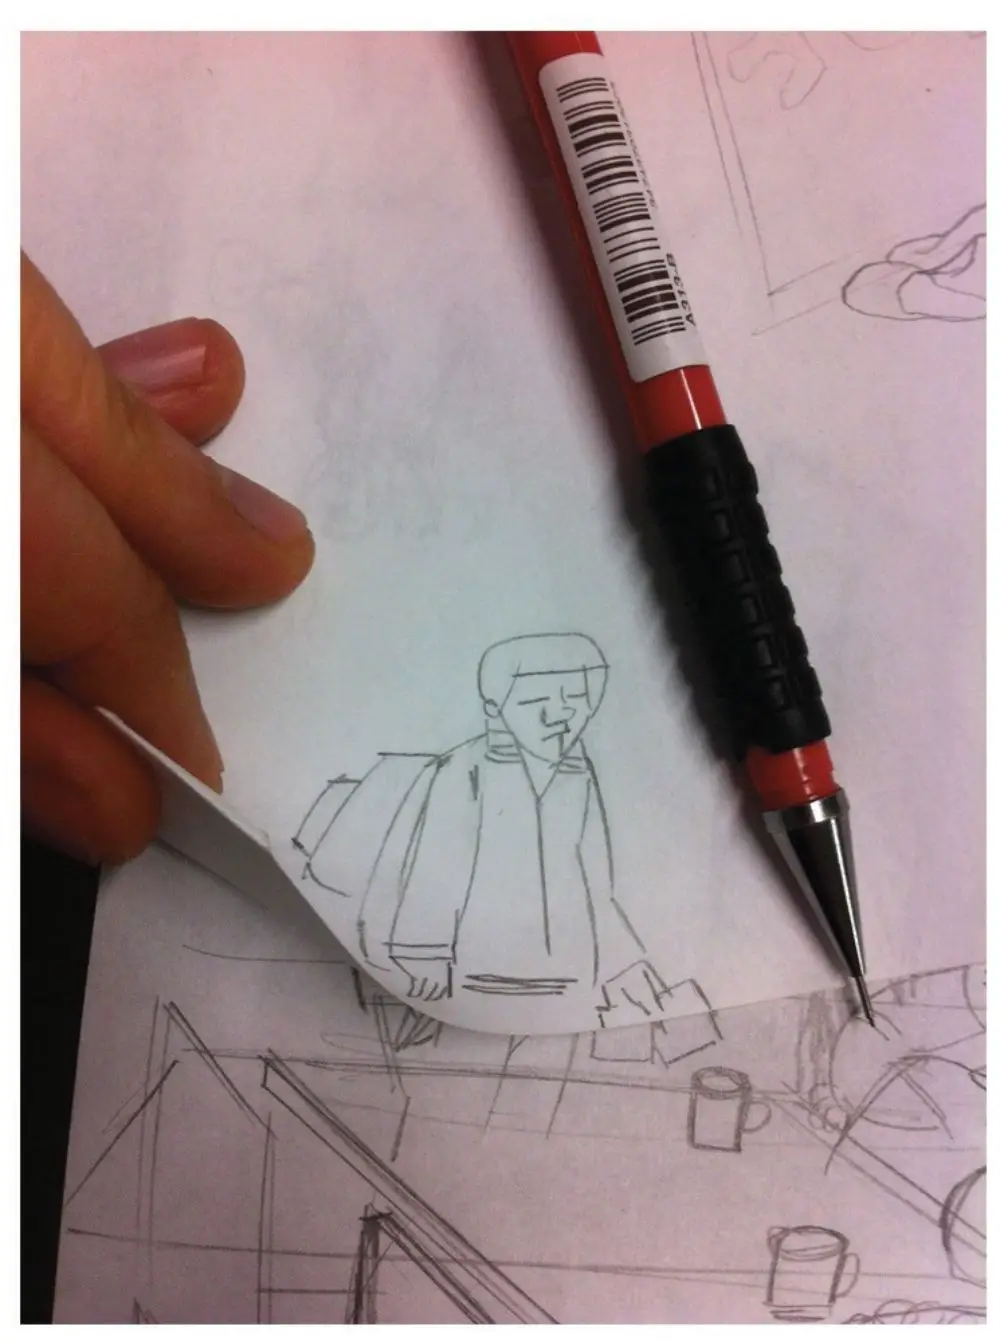
An essential step after deciding the characters is, sketching them. You should roughly sketch out all the characters according to the traits you have listed out in the previous step. Look at the traits of each character and start drawing them according to how you have described them.
For instance, draw a big nose of a person-A if you have described likewise. Attention to small details would yield you an excellent looking caricature of the characters that are supposed to star in your comic strip. If you are taking inspiration from the outside world, you can start drawing the caricature similar to the person you are taking into account. If you are creating a caricature that looks like your best friend, you should observe his traits, the way he sits, the way he walks and many other things.
To begin sketching, the selection of necessary tools is essential. By tools, we mean the selection of right pen, paper and pencil to draw your sketches. Using a pencil to develop a sketch is helpful because you can change the sketch by rubbing out the unnecessary and unwanted details. Hence, experimenting with different tools can yield you a good set of tools to develop your sketches.
Here, we have used a 0.3 mm mechanical pencil on a layout paper. Generally, a layout paper is fragile and is often used by cartoonists to draw their characters and then refine them as they advance towards developing their characters. Because of the thin nature of the layout paper, it is easy to draw and trace the drawings quickly and refine them.
4. Constructing your composition:
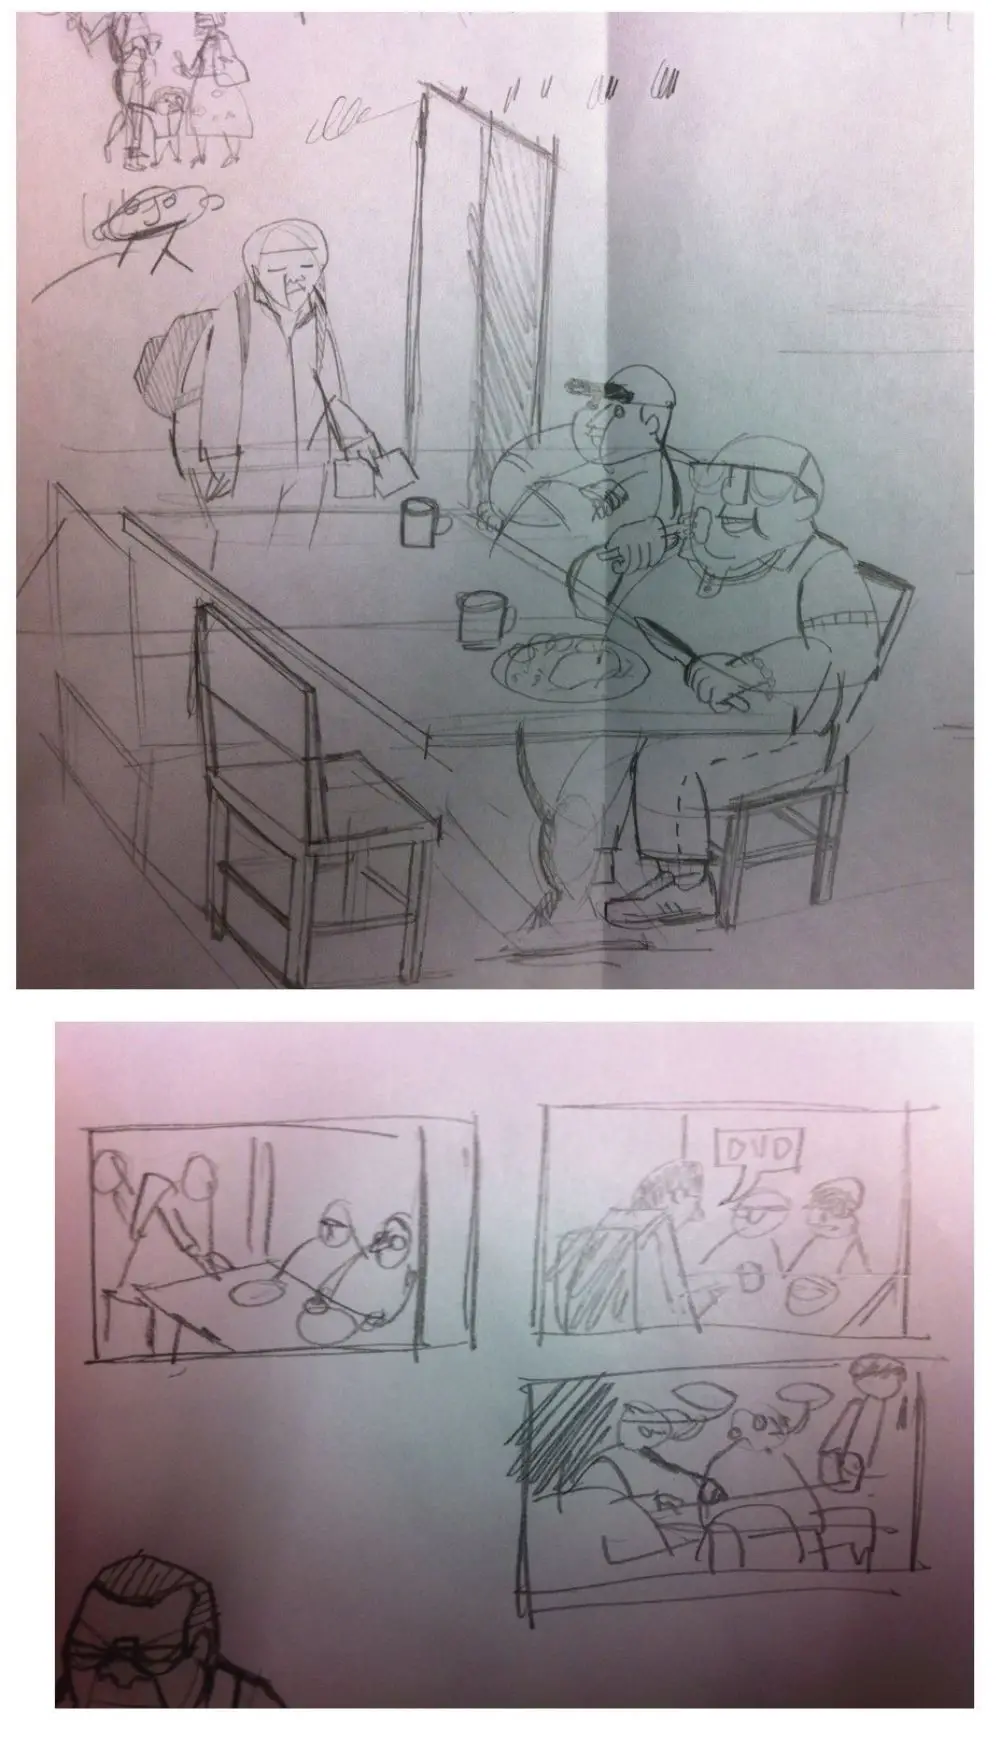
This step begins with thinking about constructing your composition. The composition is an art of redrawing characters to fine-tune the details of how they look like in your imagination. Initially, during the sketching phase, you must have drawn rough strokes to let the image of the character in your mind, emerge out. But when you transition to this phase, you have to give it sharp details to tune out the unnecessary strokes and noise. And then you combine the characters and form a scene.
Here, we draw things very quickly yet roughly to create a rough idea of how the final comic strip is going to appear. These drawings don’t need to be masterpieces. They are just a functional idea of how the action in the frame appears. But in this step, the real characters are going to evolve and come out clearly. This is the step where you decide whether the characters that have evolved appear as per your requirements.
Once you are happy with your composition, you can refine the drawings and retrace in Illustrator. The advantage of working with a digital platform is, you can form and create different elements separately and bunch them together on the computer system.
5. Scanning the composition:
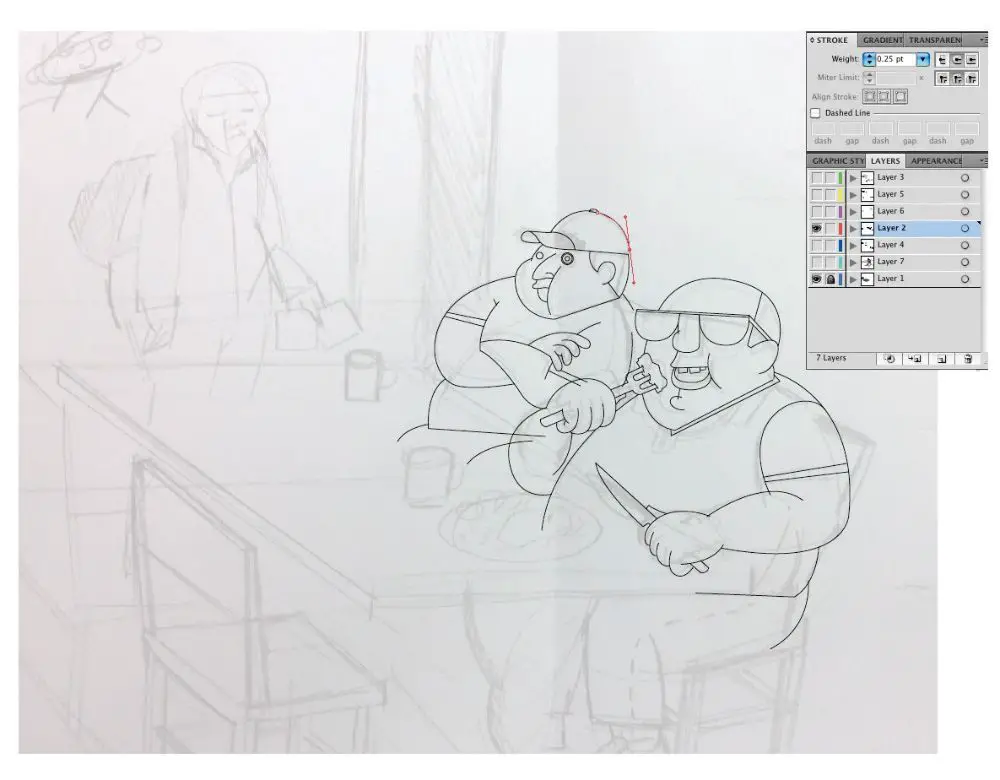
Once you are satisfied with the composition after retracing it multiple times and refining it to form clear elements, you can now scan the drawing and import it into Illustrator. After importing the drawing, the first thing you do is, lower the transparency of the image so that when you trace the image, you can see what you are drawing.
Now from here onwards, you can trace your figures using the Pen tool in Illustrator. The Pen tool in Illustrator is one of the potent tools of Illustrator. You can draw curves and straight lines. You click on the blank document to create points and then join them to create curves or straight lines or both depending upon your requirement.
It is also possible to remove points if the need to do the same arises. You can also move points to change the symmetry of the lines and curves that you have created.
During tracing the images, it would be best to work with 0.25 stroke weight to gain maximum precision. Later you can alter things to give them a realistic and dynamic feel. Here your caricatures may look like they have emerged correctly. You look at the first-ever sketch that you made of the character in question, and now you have come a long way to find the accurate details of the character.
6. Refining the caricatures:
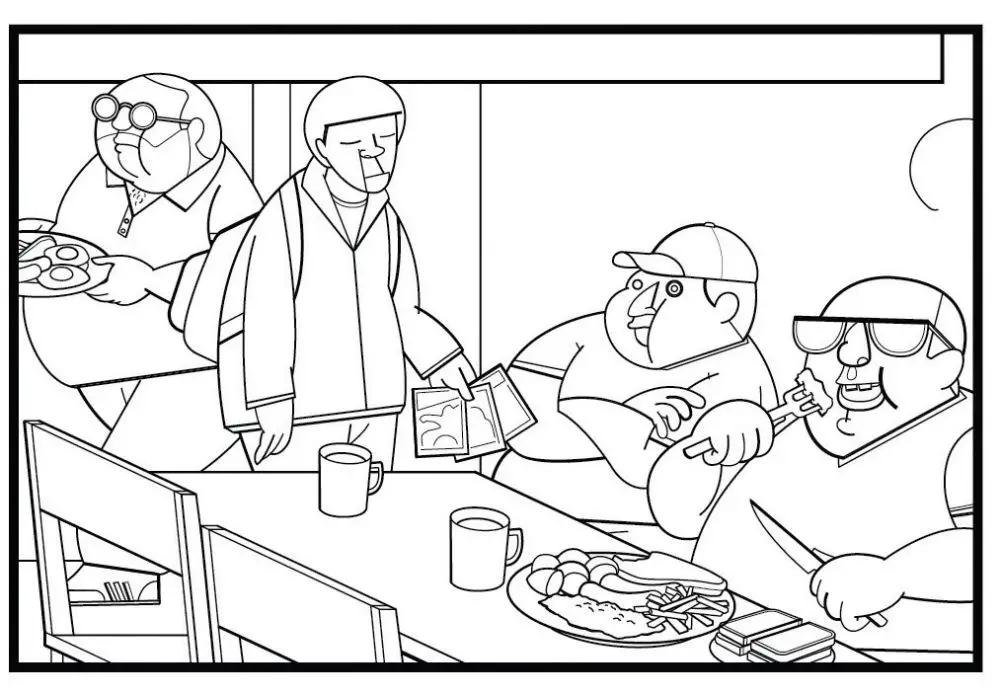
By this point, you should have satisfactory tracing of a rough picture. Now, you should hide and unhide the layers beneath it to find the cleanliness of the drawing. As this happens, make the boundaries and line work bolder and stronger that comes up as confident. As you go about it, you can find the right drawing according to your requirement. Hence, you can change the line width from the stroke width palette.
Stroke width palette is the palette that allows you to define the kind of strokes that you want to use in developing your graphics. By default, the stroke that you create is a 1-point black stroke. With the use of the Stroke Width Palette, you can easily change the color of the stroke or the weight of the stroke to make it thinner or healthier. Strokes in Illustrator are aligned to the centre of a path edge by default, but you can change their alignment by making the use of Stroke Width palette.
7. Copy the drawing in Adobe Photoshop:
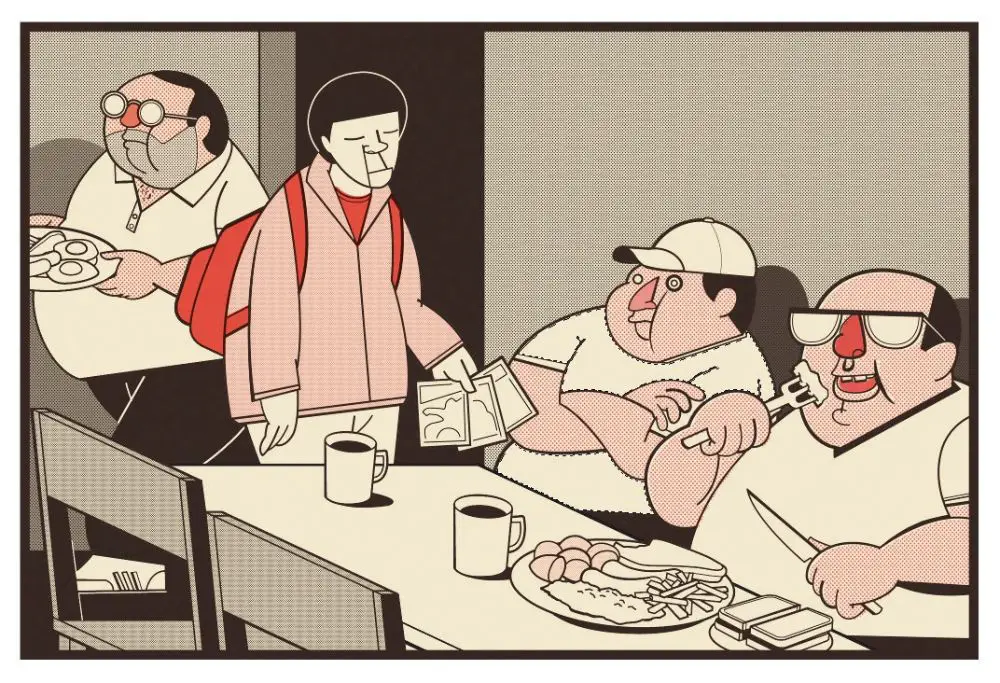
After accomplishing the above steps, you should now copy your drawing into Adobe Photoshop to commence the addition of colors and tones. As we are targeting retro style comic creation, we can add limited colors. Back in the 1950s, we did not have access to variations of the colors. There were many technological restrictions. Here, you should consider putting red and black tones to depict a retro style comic. By using halftone, you can achieve a grey and flesh tone pink.
Halftones are dots of different sizes and spacing to simulate a tone or a gradient. This method is generally used for printing and to form retro comics. However, with the appearance it offers, it has gained popularity on the digital platforms as well. Halftone is not limited only to using dots for creating gradient or tone. You can also use lines and patterns to create halftone. Halftones give your comic strips an individual retro style comic feel.
8. The final stage:
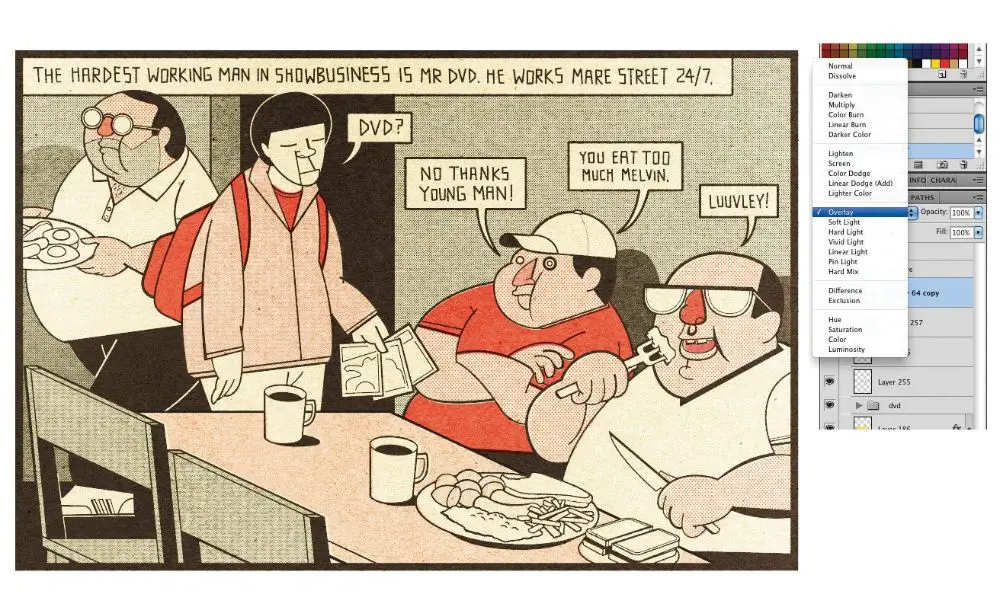
To tie up everything together, we can put a texture of a paper over the image to enhance the feel of the old comics and to give it a retro look and feel. You can do this by scanning the old, textured paper and then putting it on the other layers that sit beneath it. Finally, set the blending mode to Overlay.
Blend Mode in Adobe Illustrator offers you transparency to varying degrees, making the objects beneath the layer visible. A blending mode shows you how the resulting transparency would appear. Different blending modes are offered by Illustrator to offer you various types of blending effects. You can choose the various effects of the options that Illustrator has to offer.
Using an old, textured paper allows you to give your comic a feel that the comics are old and belong to an era before the 1980s.
Conclusion:
There was a reason why the comics were designed and printed in a certain way. One glance at them, and it would take you back to the era where there was no technology. It was an era where storytelling was done merely through comics and novels. Back then, there were no Kindle, Wattpad, Audible, and other similar applications to entertain a reader. Kids were used to reading comics whether they were colorful or black and white strips.
Now, confident storytellers have turned to the development of retro comics. They are trying to bring back the era of the comic strips. Advanced technologies have eased the creation of comics. Moreover, there is an individual community who still prefers reading over watching the action-packed movies that are filled with adventure. Moreover, any graphic designer, who is pro at using Adobe Illustrator and Adobe Photoshop, can create retro style comic strips. And if we consider a novice using Illustrator and Photoshop to create a comic strip, the above steps are very insightful in the creation of retro style comic strips.
Today, technological advancement has given way to illustrative techniques like digital painting and 3D modeling, and it has changed the way a comic was once perceived. Kids these days need to see what kids from the old era used to read.
via https://ift.tt/2zegyAd

No comments:
Post a Comment