Even though there are many logo maker tools out there, very few can match the performance of Wix Logo Maker. Having already established its dominance in the website building sector, Wix is now employing its experience and expertise in online logo-making tools. And this is paying off as Wix has left behind its competitors in this sector who frustrate users through limited design elements, complex editing tools and high-cost plans.
Wix establishes its superiority by offering a lot of logo template varieties along with thousands of shapes and elements to choose from. The logo editing features are also simple to use and powerful enough to give you the creative bandwidth to design the logo you want.
Click the image below to get started, for free.
You do not need any prior graphic designing skills to design a logo in Wix. The process is so intuitive that Wix understands your requirements and offers you excellent logo choices. This is why millions of people across the globe are using the Wix logo maker tool regularly.
Creating a logo online is easy, especially when using a powerful tool like the Wix Logo Maker. The entire process is divided into simple steps, so the user is not overwhelmed. Wix ensures that it takes the right input from you, analyzes it and keeps that as a base when offering you options. You can also edit the options or reset the inputs any time you want. As a user, you just need to follow these steps:
1. Getting Started With Wix Logo Maker:
The first step to starting your logo designing journey is going to the Wix Logo Maker website. The website is going to look like the image given below. You need to click on the “Start Now” button to proceed. You can, of course, scroll through the website and check out the logo-making features that Wix offers.
The next screen that you will see is where Wix asks you how you want to go ahead with the logo designing task. You can create a logo by yourself using the Wix logo maker or hire a professional designer. It is important to note that Wix also provides professional logo designing services, which would come at a premium cost. As you are designing the logo by yourself, you need to select the first option, “Create a Logo”.
When you select that option, you will be redirected to the sign-in page of Wix. If you already have an account in Wix, you can sign in with that, or you can continue with your Google or Facebook account. If you don’t have an account and wish to create one, you can sign-up from this page. Please note that you will not be able to proceed ahead without signing in. This is the case with all of the best free logo makers.
2. Providing Inputs:
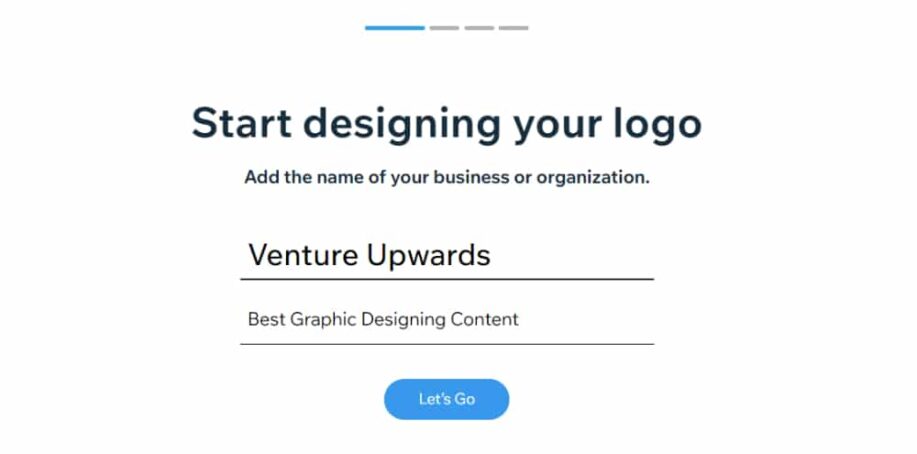
Wix has created a brilliant process of gathering the needed details for designing the logo. Instead of asking you to fill up a form, it collects input. The first input it needs is the name of the organization that needs to be used on the logo. Please enter the name as you would want to appear in the branding and not the full official name. Wix also provides the tagline option in case you want to add that too in the logo.
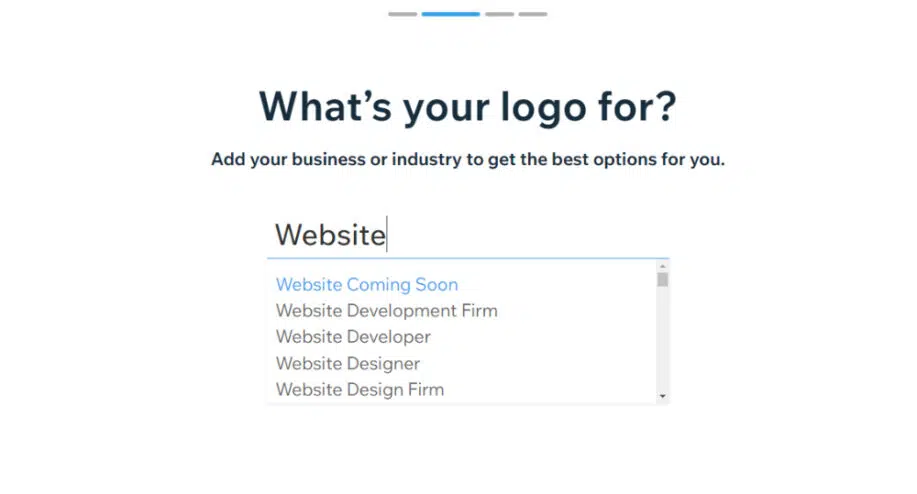
Once you provide the name and tagline, Wix will ask you the industry or sector that your business represents. The good part here is that Wix will suggest options you can choose from as you type. This step is essential as Wix will know what kind of logos work best for your industry.
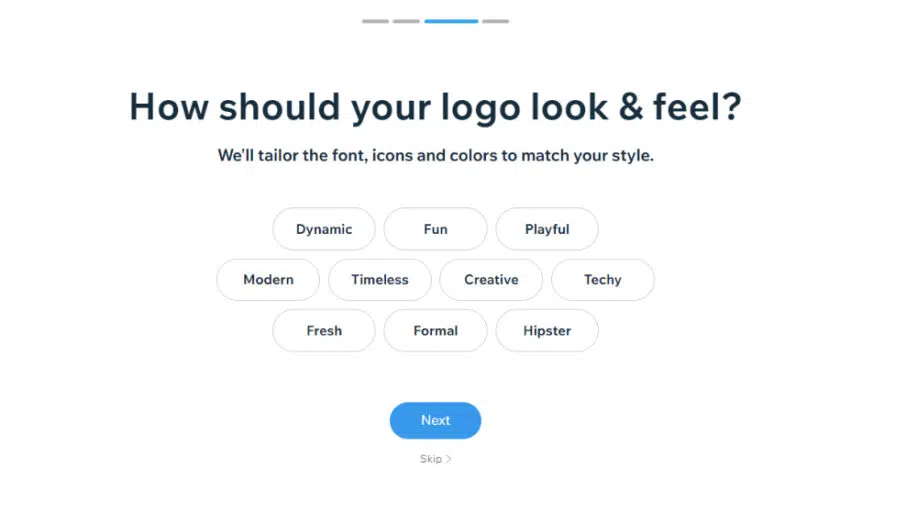
The next step is about choosing the style of the logo. Whether you want the logo to be fun, creative or formal and modern, you can select multiple options here and also; you have the option of skipping this step. But do bear in mind that the more input you provide, the better logo options Wix Logo Maker will be able to generate.
3. Choosing Logo Style:
This step is actually fun as Wix presents two varied logo options for you to choose from. Do note that these are not the logo options for your business. This step is there to understand what you do like visually. You can select the option which you prefer more or can also select “I don’t like either of them”. Wix does this selection task 5 times, and this step serves as a major input as it understands what visual representation you like. You can skip this step entirely, but we suggest that providing these inputs will help the Wix logo maker deliver better options for you.
4. Checking Out First Batch Options:
Now that Wix has got its input, it will present the first batch of options to you. They will be varied in terms of composition, color scheme, font style and more. You should ideally scroll through the options and shortlist the one you like the best. Remember that you always have the option of changing the color, font and other elements. Hence in this step, you should focus more on logo style and composition. Minor tweaking is always going to follow and will be needed. Do not get frustrated if you do not like any of the options, as you always can refresh the process, and the Wix logo maker will give you new options.
5. Replacing Icon:
One good feature that the Wix logo maker provides right at the start is the option to replace the icon element used in the logo. The majority of the time, this part becomes the most tricky one. You can click on the “Replace Icon” button, and a window will show loads of icon options. There is a search option right on the top wherein you can provide the keyword of the icon you want. Or else you can also filter them on the options in the top right corner. Browse through the icons and select one most appropriate. Again keep in mind that you will have the option of editing this icon in the next step.
6. Understanding the Workspace:
When you select the logo option you like the most; you will be directed toward the Wix editor workspace. This may seem overwhelming at the start, but you can get the hang of it in just seconds. This is the place where all the logo editing happens.
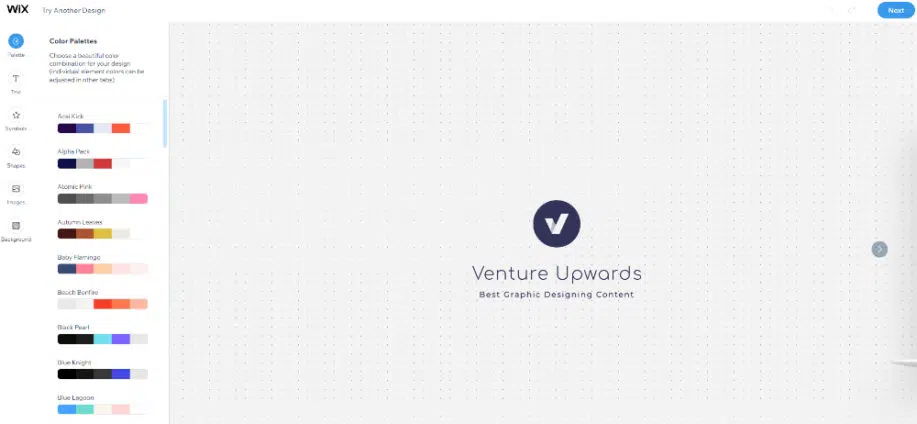
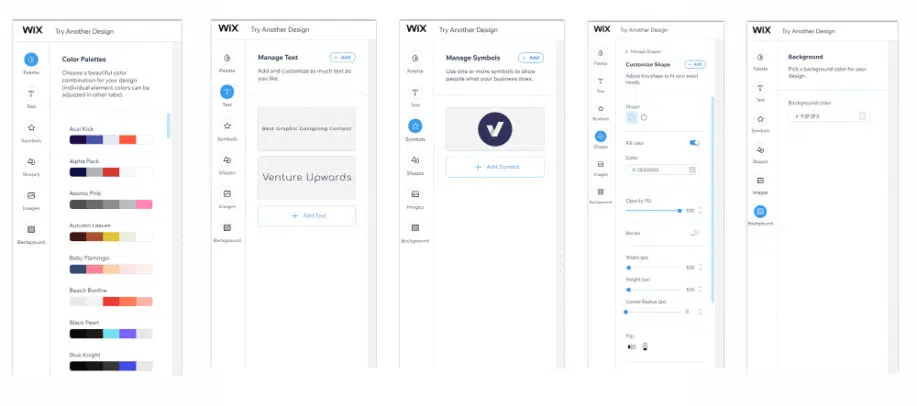
As you can see, the logo you selected is in the center of the editing workspace. On the left is the editing sidebar, which has all the editing options. The logo maker gives you the following editing tools:
- Palette: Change the color scheme of the logo
- Text: Customize text, font style and spacing
- Symbols: Add icons or other symbols to the logo
- Shapes: Add basic shapes like lines, and rectangles as per need
- Images: Insert images from the library or upload them if needed
- Background: Change the background color
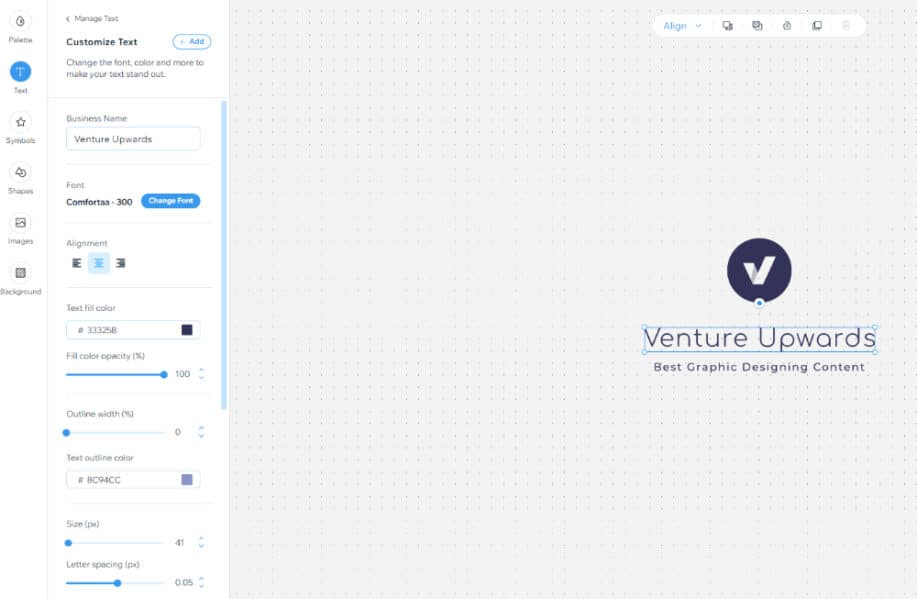
7. Customizing Text:
By default, Wix uses the business name and tagline you have provided at the start as the text for the logo. You can always change this text if need be. In the text editor, you also get to customize the style of this text. You can select a different web font if needed. Wix offers over 50 font styles. Then you can also change the text alignment, color, opacity, font size and letter spacing. Wix also allows you to add outline color, shadow and blur to the text element. You can play around with these settings till you are satisfied with the text part of the logo.
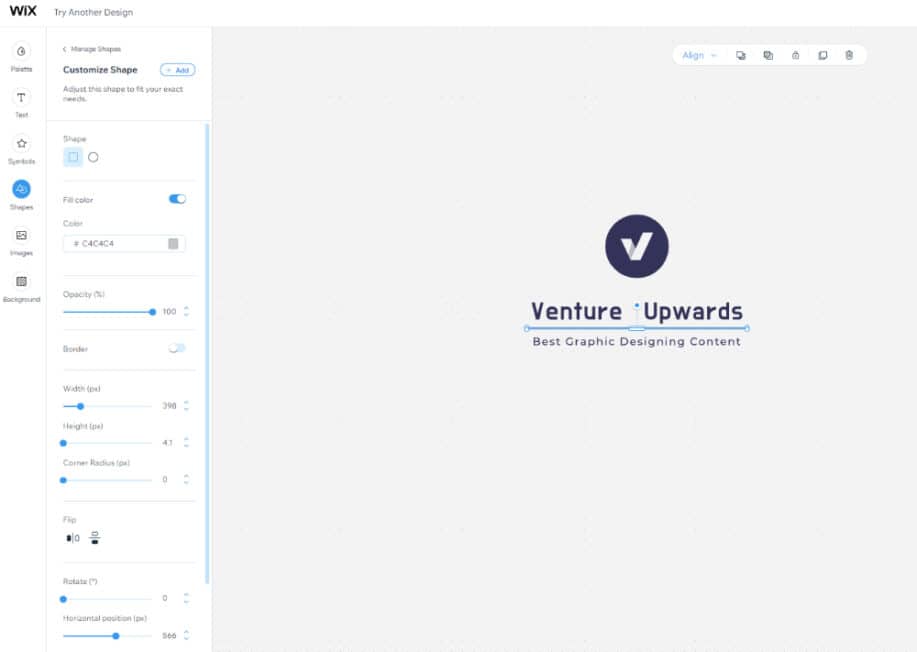
8. Editing Shapes:
You have the option of adding shapes to the logo if you want. For example, we have added a thin line as a separator between the logo and the tagline. In terms of customization, the Wix logo maker allows you to change the color, opacity, height, width, corner radius and many other parameters. You can also play around with the shapes by flipping them or adding shadow and blur effects. Make sure that the alignment of the shapes is in line with the overall logo composition.
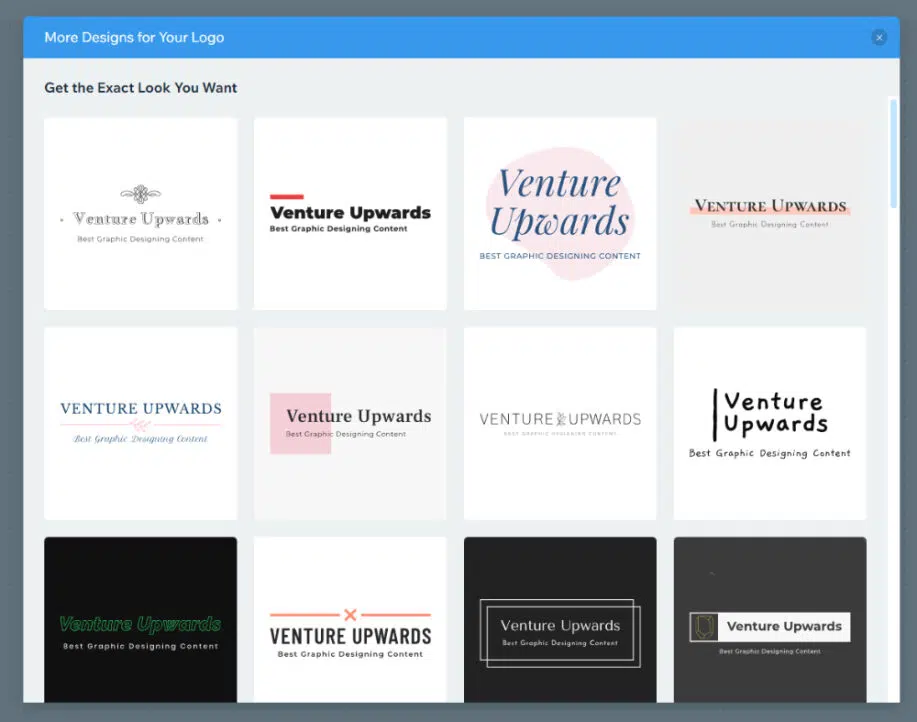
9. Try Another Design:
There is a possibility that even after all the fine-tuning, you are not happy with the result. Worry not, because the Wix logo maker always has more options for you. You can click on the “Try Another Design” option in the top left corner, and Wix will open a window showing other new options. These designs will be inspired by the input you have provided and your chosen logo. You can now select the one you like more and start the process of editing that logo in the workspace.
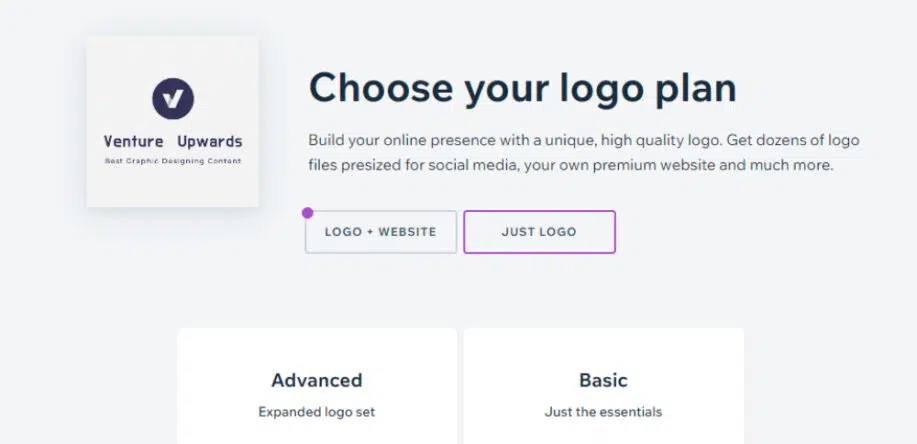
10. Download Logo:
Once you are satisfied with the logo editing part, you can finalize it and download it for further use. The Wix logo maker will open the window, asking you to choose a plan. It also allows you to move ahead with a website based on the logo. In terms of logo plans, it has two options:
- Basic – $20
- Standard logo files (8 PNG logo files)
- Full commercial usage rights
- Advanced – $50
- Standard logo files (8 PNG logo files)
- Full commercial usage rights
- Resizable logo files (5 SVG files)
- Social Media Logo files (40+ versions for different platforms)
Wix logo maker also allows you to download the free sample of the logo you have created. But this will be a low-resolution version. It can be used for previewing or presenting idea options if needed.
You can create a stunning logo using the Wix logo maker tool in the above ten simple steps. Then, depending on the time you want to invest, you can work on the customization part of the logo. The more time you spend, the better you understand the process and the better the output will be.
10 Tips to design a stunning logo with the Wix logo maker
The Wix logo maker has a lot of scope for applying your creativity. Right from giving the inputs to fine-tuning the logo in the editor workspace. Here are some valuable tips to help you make the most of the Wix logo maker.
1. Use Right Icons:
Using a suitable visual representation is key to a successful logo. Wix provides you with thousands of icons to choose from. However, you should select the icon based on the concept that best suits your brand.
2. Add Extra Space:
It would be best if you allowed your logo to breathe. Cramping up with too many elements would make it look not pleasant. Instead, go for extra white spaces wherever needed and use refined and clean elements offered by Wix.
3. Choose the Right Fonts:
The font will play an essential role in setting your branding style. For example, use serif fonts if you are in the fashion industry or bold, strong ones if you are in the fitness or gaming sector. Understand which fonts work best for you and choose from the variety of fonts offered by Wix.
4. Add a Tagline:
A tagline in the logo always helps to add more meaning to it. Taglines allow you to talk about your business, products or values. Wix logo maker allows you to add and customize a tagline whenever possible.
5. Keep Elements Aligned:
Unlike other logo creators, Wix logo maker offers a convenient alignment tool which you can use to ensure that all the elements are correctly aligned. A logo which does not have its elements properly aligned will look shabby.
6. Choose the Right Colors:
Understanding the science of colors and utilizing it when designing the logo will help you create an effective logo. The Wix logo maker works through color palettes, making it easy for you to apply a uniform and good-looking color scheme to the logo.
7. Keep Elements to Proportion:
The scaling tool in the Wix logo maker gives you excellent control over the sizing of the elements, and you be precise in the entire composition. This design aspect is crucial to make the logo look balanced and professional.
8. Add background to Logo:
At times, adding the correct type of background can make your logo stand out. Whether in the form of a texture or solid colors, Wix allows you to set up the background you need. Just make sure that the background is in contrast with the main logo.
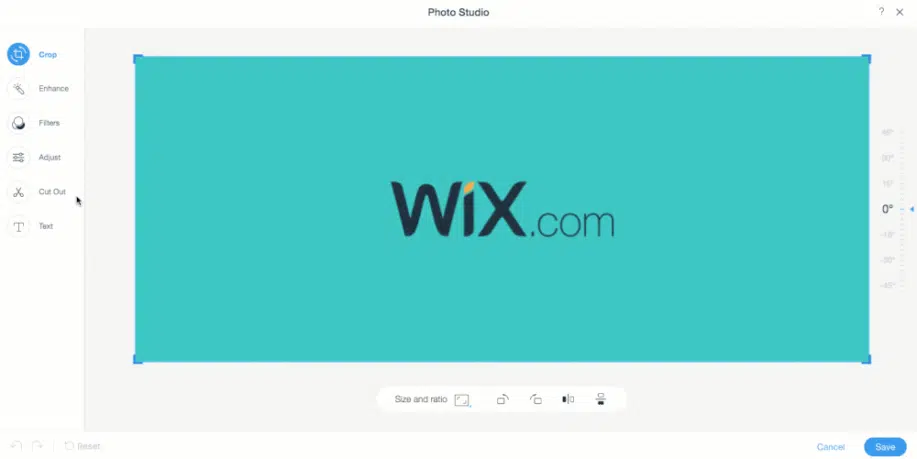
9. Upload Custom Images:
Wix logo maker allows you to upload any custom image you want to add to your logo. So if you have an icon, texture, or any other design element created from past projects, then you can add it to the new logo and even customize it as needed.
10. Get Feedback:
Getting feedback from people on your logo is always a good idea. Wix logo maker allows you to download free samples of your final logo. Hence you can create different logo designs, download them and share them with others to get their feedback.
Wix logo maker is a very easy-to-use online logo creator and offers many logo templates and design elements. The good part about Wix is that it caters to all users. If you are an entrepreneur who does not have the skills or time to invest in logo design, you can also create a logo in no time. On the other hand, for people with good design skills, the editor offers many tools to customize the logo with their creativity. This blog has given a step-by-step tutorial on designing a logo using the Wix logo maker and a few tips to make the most out of this fantastic tool.
Click the image below to get started, for free.
The post Wix Logo Maker: 10 Tips & Step by Step Tutorial appeared first on Web Design Dev.
Wix Logo Maker: 10 Tips & Step by Step Tutorial was first posted on July 6, 2022 at 1:06 pm.
©2022 "Web Design Dev". Use of this feed is for personal non-commercial use only. If you are not reading this article in your feed reader, then the site is guilty of copyright infringement. Please contact me at jc@ventureupwards.com
via https://ift.tt/GBdn7kq


No comments:
Post a Comment