Photoshop is the best editing tool and one of the most preferred creative weapons of designers. The brush tool in Photoshop helps to create designs and is useful for the digital artist too. The brush tool in Photoshop is easy to use and suitable for the digital artist. With brush tools, you are able to get smooth effects. You can find brush tools in the folders too and choose the brushes for unique and specific effects. The tools in Photoshop may seem simple. However, customization provides the artist with a lot of options and freedom to go beyond what seems like a limit.
The brush tool is one of the basic painting tools in Photoshop. You can apply colors using strokes with this painting tool. Brush tip shape, Opacity, Flow, blending mode is the main options of brushing tools. Photoshop has built-in presets, which are premade brushes that you can put in use immediately.
When it comes to sketching, painting and retouching involving masking, retouching backgrounds, enhancing eyes, working with masks, skin and clothing, swapping heads, making vignettes, dodging and burning, this can be all done by the basic brushes in Photoshop. The brushes have different blending modes with Brush Option Menu available or by using a blending mode.
In this useful guide, will provide an outline to how to use the brush tool in Photoshop.
1. To create a basic outline:
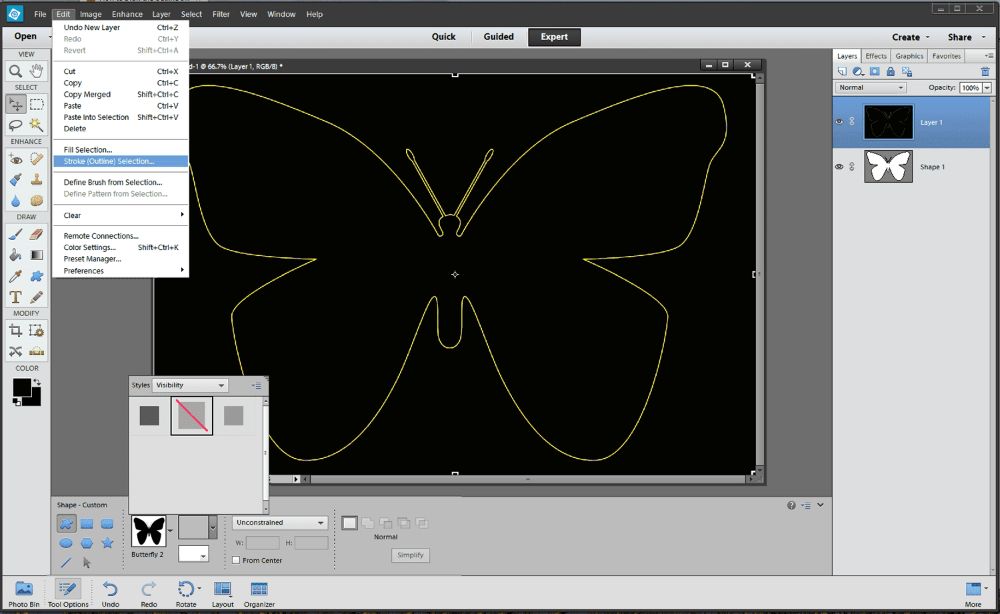
If you want to create outlines in any kind of projects, the brush tool is the best. To create a new layer in the layer palette and to select a brush press B and begin drawing. If you create a guide layer on the new layer and set it in a lower opacity level, then your work is visible over it. To change the direction of the brush where it drags over the image, use the crosshair icon.
It is very helpful if you are using custom brushes. Your recently used brushes would be below the crosshair icon. If the designer is working on a project in which you need to use small set of brushes as per the requirement, then the recently used brushes would be helpful. You can sort the brushes in the folders, so it is easy to find as per your need. To make your workflow is smooth you can edit the folders.
2. Blend Brushstrokes:
If you want to blend the shades that you apply to the piece, you must activate the mixer brush. You can change the Opacity and Flow setting of the brush. It depends on the blend mode how the brushstroke appears on the pixels. If you want to mix the light and dark strokes, use overlay mode or multiply. To create more realistic brush strokes, use Airbrush Style Effect Icon, which is to the left of Smoothing dropdown. If you want less jagged lines smoothing feature can help you out.
When you use the Brush Tool to paint, you can choose Blending Mode for doing stroke. If you want to mix the color with the objects using mathematical formulas which works over RGB values of every pixel, then use the Blending Mode. Normal, Dissolve, Behind, and Clear is the Blending Modes.
- Normal Mode: This mode allows us to paint the color without applying any changes to the color pixels.
- Dissolve Mode: It adds noise to the edge of the brush stroke.
- Behind Mode: It allows for painting behind the existing stroke on the same layer.
- Clear Mode: With Clear mode, you can delete an existing stroke section.
There is so much with Blending modes that you can experiment on it and no matter for how long you have been using Photoshop you would end up learning something new.
3. Use the brush to mask:
With the masking feature and brush tool, a designer can create stunning effects. To hide or show the areas of the layers, you can use both mask and brush. It is a specific part that designer tends to experiment along with adjustments. With brush settings, you can adjust the smoothness of the edges and the amount of scattering of the brush you have selected. You have multiple brush types displayed in rows. It helps you to select the brush as per your project. With the help of Brush Preview, you can know how the stroke would look when applied to the image. You can bring changes through the settings.
While using the brush tool, you would come to know that there are many preloaded brushes and options to change or refine the options like smoothness, tip shape and texture as per one’s preference. It also has a thumbnail that shows how the stroke would look like when it is in use. For retouching, the images use the brush tool. The brush tool is at the top of the Brush Window in three sets. There are specific tips and ways to use the brush tool in photoshop, and they are as below:
1. Brush Tip:
With the brush tip, you can easily alter the way to add color on your image in Photoshop with the brush tool. You can find built-in presets in the default Options Panel in Brush Preset Picker. You can adjust two elements through these presets. If you want to adjust the size by increasing or decreasing the size of the brush-tip use master diameter. Left bracket key and right bracket key are the shortcut keys to increase or decrease the size of the brush tip. The brush tip is mostly used for foreground color though you can combine foreground and background color.
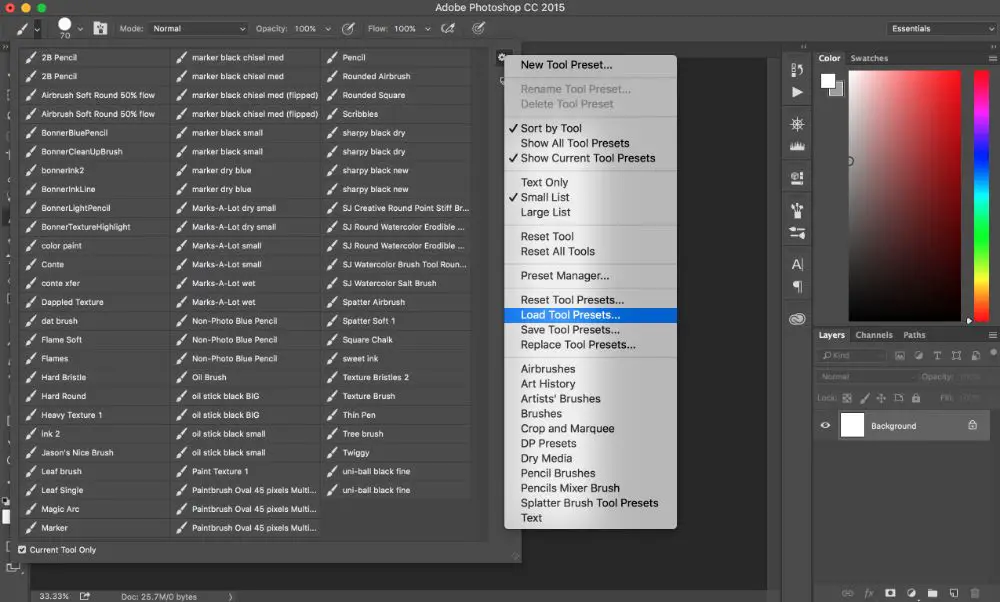
2. Preset Picker Contextual Menu:

Create a New Preset, Edit it, and Delete are in the Brush Picker menu, which are useful tools. Also, you would get options to display the brush list in the Preset Picker panel. Managing the Brush list becomes easy with the loading, saving and replacing the brushes and add existing brush collections.
3. Brush Panel:
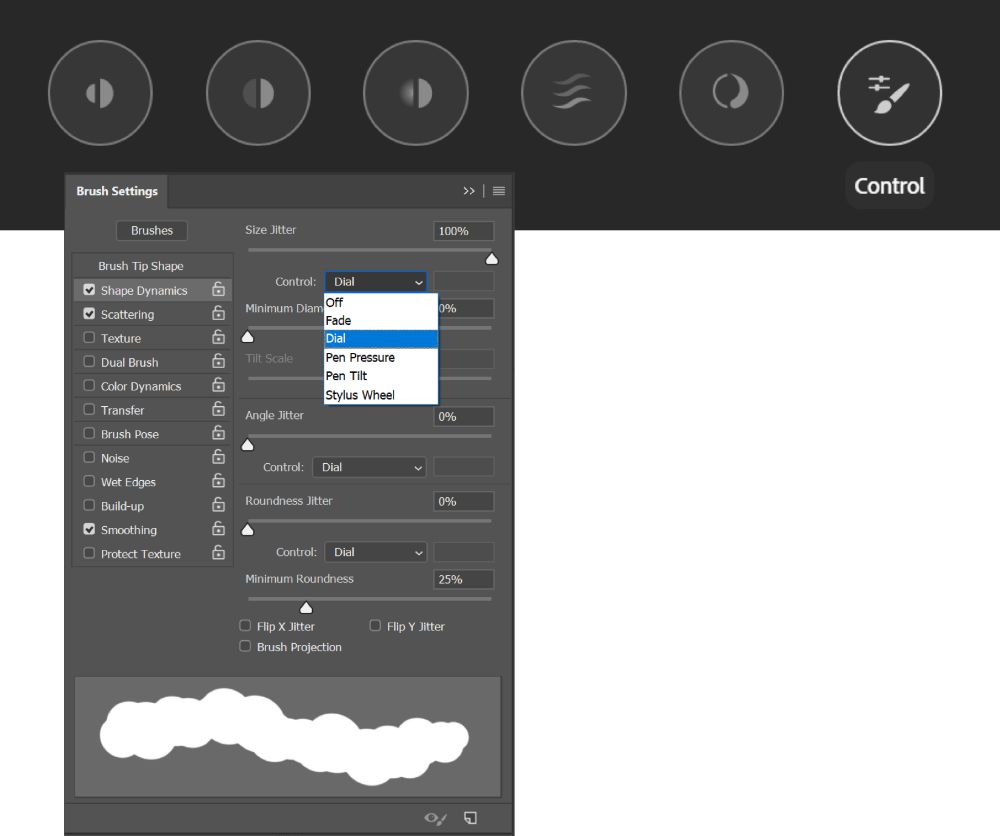
If you want to create, edit, save and load a specific brush behavior or Brush Preset then focus on Brush Panel. In Brush Panel, you can customise things like background or foreground jitter, opacity jitter, flow jitter, brush tip shape, configure control, scattering for each variation. To use the panel, go to Window> Brushes or press F5 Key. Try every active brush to see what happens.
4. Brush Tool Presets:
Brush preset is known as the basic of Photoshop Brush and for all image retouching. The two variations are uniform width and opacity which you get in all kind of strokes, be it a soft or hard edge.
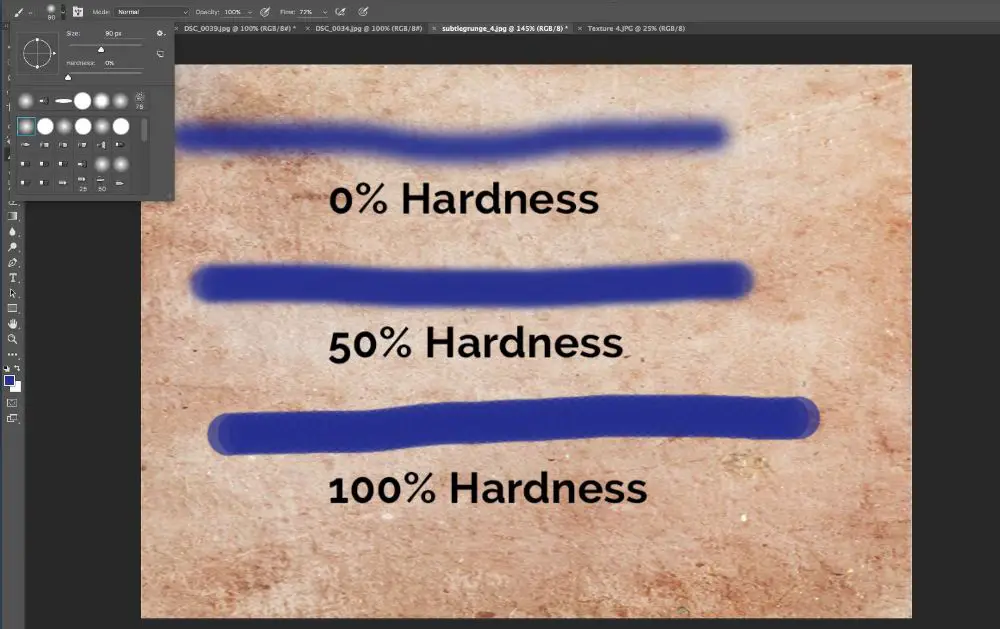
If you want to retouch brushwork, one of the best choices is soft-edged variation. When it comes to blocking things and erasing then the hard edge is better. When you use the soft edge brush, the tightness of edge is managed by the brush size or by Hardness slider of Brush Options Menu Bar. -Control option on Mac and Alt-Right Mouse Click on PC are the shortcuts if you want to adjust the hardness on screen.
It really depends on the designers whether to use the brush size to control on the hardness or through keyboard shortcut options. So, for the beginners trying both ways and deciding on one would be better as per preference. If you use brush size to control the hardness, the small brush gives a tight edge, and large brush gives a softer gradient.
Designers tend to use colors on various layers with soft brushes and create edge definition with Layer Masks and with different sizes of brushes. It helps to create smooth gradient color in different degrees of sharpness. For example, while designing a person’s eye in Photoshop, the white of the eye should have a hard edge near the iris and soft gradient fall in the natural white area.
Brush Tool can help the designers to create amazing effects like to show a star-filled landscape, downpour and much more. Other tools in Photoshop can only help to alter the actual image. With Brush tool, you can create something from scratch and then paint them in an image. Certain websites provide you with customised brush tools to make the work easier. Some of them we can discuss here.
-
- Star Brush: Star filled sky is something that everyone loves. Not all need to have tools to capture the starry sky. Star Brush allows you to paint stars and lighten up the dark sky.
- Cloud Brush: With Cloud brush tool, you can paint natural-looking clouds. You can easily create a significant visual interest to the sky or any landscape using Cloud Brush tool.
- Grunge Brush: Textures in the image makes it look authentic. If you want to create a vintage look or grunge look for your image, then Grunge Brush would do the work for you.
- Smoke brush: Painting realistic smoke is a bit difficult. But with the perfect brush like a Smoke brush, you can create smoke that brings a mood or a dynamic action scene.
- Create Mood and Atmosphere: If you want to create an environment which reflects the mood or atmosphere, this tool would be helpful. Turn a normal image into an extraordinary visual by creating rain, fog or smoke and add drama to the image.
- Lighting Effects: If you want to add sun rays through the mountains or bring out the intrinsic details of natural beauty or add brightness using environmental textures, then you can create a customised tool for the same.
- Cut-out Subjects: It is one of the necessary and usual things to cut out subjects and replace them. Sometimes it becomes difficult when it involves too many layers or complicated environment. Using the pen tool, you can cut out, and with the customised brush tool, you can replace it or create a realistic image.
- Brushes for Hair: If you want to create hair to your visually realistic subject, like curly hair, straight hair or long lock or maybe a goatee or stubble on the chin then you can create a customised brush which makes the detailing more realistic and natural. Maintaining the hair texture and style is necessary as it gives the brush more importance.
Conclusion:
It solely depends on the need of the designers and the project he works on; about what kind of brush he would need to make the design or image look realistic. The Brush tool not only makes the image look realistic but can help to create more drama and effects. This enhances the design and stands out from others. With the Brush tool you can multitask, and it makes the work of the designer easier in terms of creating the best and refined design. The more the designer keeps on working and experimenting, he is bound to create his Brush tool and gain additional knowledge about the elements in Photoshop.
If you want to experience all the results of brush tool, then you would have to keep on experimenting with it. When you understand all the options of a tool, it could help you to achieve flawless work. Moreover, there are chances that the trial and error would be less. Achieving the desired result is possible with more efficiency. Using the brush tool in Photoshop is quite easy when you read the process as mentioned above. Brush Tools provide designers with freedom for being creative and makes a task like a photo editing and retouching easier.
Other than what we have discussed above, there are additional and infinite adjustments and default setting in Photoshop to create your custom brushes. Not only can you create your brushes but share them with other people. You can personalise Photoshop and add custom brushes as per your need or preferences.
The post Your Guide to Using the Brush Tool in Photoshop appeared first on Web Design Dev.
via https://ift.tt/3bGX4Bj


No comments:
Post a Comment