Editing images today is a simple task thanks to the large number of programs that exist. You should know that not only payment alternatives like Photoshop offer powerful tools, but also other free options like GIMP are perfect for professional work. The problem with the latter is that, despite having many design options, it lacks a font gallery with which to edit texts. That is why today we will teach you how to add fonts to GIMP quickly and easily.
GIMP, like other drawing tools, can be customized by adding plugins that make the user experience a little simpler depending on what you need. Among the most popular is to add new fonts, especially considering that their default gallery is scarce.
The good thing is that GIMP knows how to solve this lack of fonts thanks to its compatibility with FreeType 2 and the administration system hosted in Fontconfig. It will be enough to install the font you want within this path to be able to use it in the program.
In case this is too complicated, you must also know that GIMP fonts can be almost anyone you have installed on your computer for other programs so that if you do not want to only use them in GIMP, the standard installation process will work perfectly.
Thanks to FreeType 2, you won’t have to worry about the type of file you download, as this library supports Type 1 Fonts (with and without a CID key), TrueType, CFF, OpenType, X11 PCF, Windows FNT, PFR, BDF, Type 42 and SFNT based bitmaps. For those who do not know the technical language, this means that almost all the fonts available for download work in GIMP.
How to add fonts to GIMP – Windows
Download the font you need
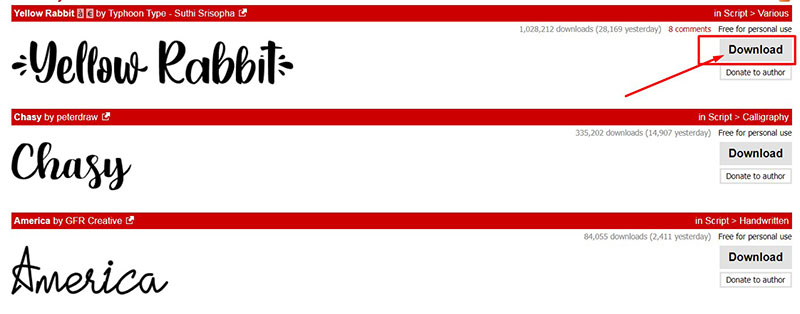
The first step to add fonts to GIMP is to find the file you want and download it to your computer.
There are many websites where you can download these files. The vast majority offer them for free, although they may have a limited number of characters or decent quality.
You can also opt for a Premium font, which will have much higher quality and a more complete gallery.
In both cases, it is recommended to pass the file you download through an antivirus before installing it to avoid problems.
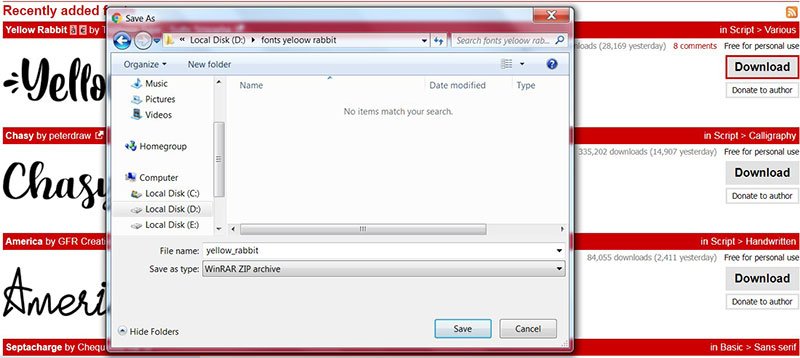
Extract the file before installing it
Although the GIMP font is a lightweight file, it will generally come in ZIP or RAR format. To use them, you will need a program to unzip them, such as WinRAR.
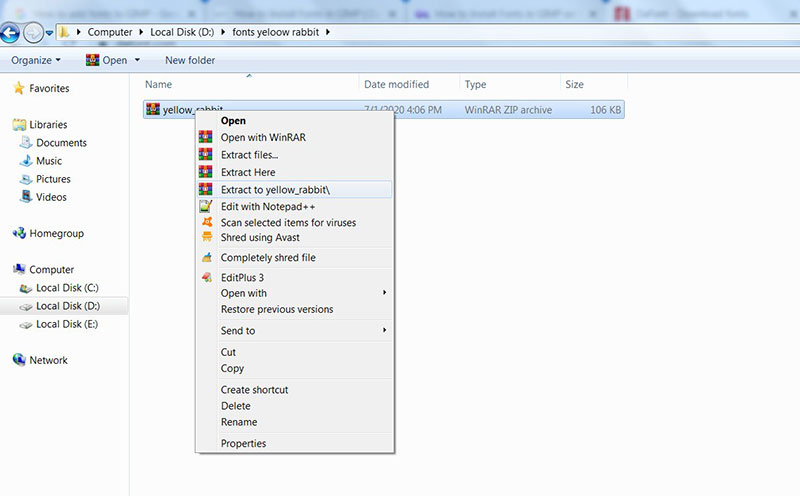
Inside you will find a folder that will include several files, some of which are simply text documents with instructions for installation or advertising on the website where you downloaded it.
Select the files you want to extract, right-click on them, and press “Extract”. You can also select “Extract files …” if you want to place them in a specific folder on the computer. Almost always what will interest you is the file with the TFF extension.
To make the next step easier, it is recommended that you create a unique folder to place fonts for GIMP.
Adding fonts to GIMP
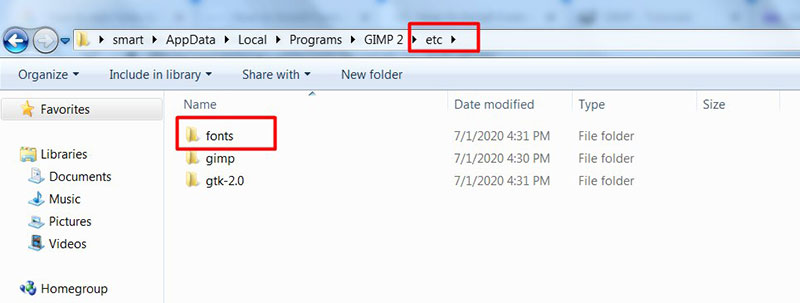
Now that you have the unzipped file, the next step is to add them directly to GIMP without having to install it in Windows. For this, you will have to locate the GIMP installation directory, which by default is on disk C, in the “Program Files” folder.
It is recommended that before continuing, close GIMP in case it is open so that the installation does not fail.
Within this directory, you should look for a folder called “etc”, and inside you should find another one named “fonts”. The font manager “fonts.conf” will be located here. You will need to edit this file using Notepad or any other text editor.
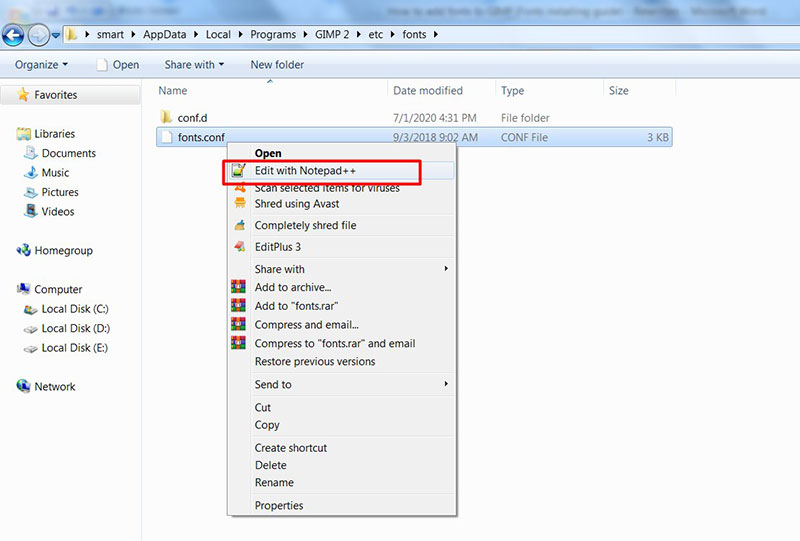
Now you need to look for a line where it prompts you to place an installation path for the fonts. Depending on where you left the file you extracted, you will have to enter the path manually. If, for example, you left it on the desktop, the path might be something like C/Desktop/Font.
Please save the file before closing so GIMP can start searching for the font.
Alternative ways of adding a font to GIMP
There are two alternative ways to add fonts to GIMP, which are the basic options for installing them on Windows. That is, with these ways you can use the fonts in other compatible programs.
Remember to close all the programs you have open for the installation to be effective.
Placing it directly in the font folder

The first option is to simply place the font file in the Windows Fonts folder. This will usually be on disk C, in the Windows folder, and in Fonts. Copy and paste the TFF or OTF file into the folder, and you should have it installed with this.
Sometimes downloaded fonts include both TFF and OTF files. On these occasions, we recommend that you install the OTF due to the greater number of options it has.
Using the installer
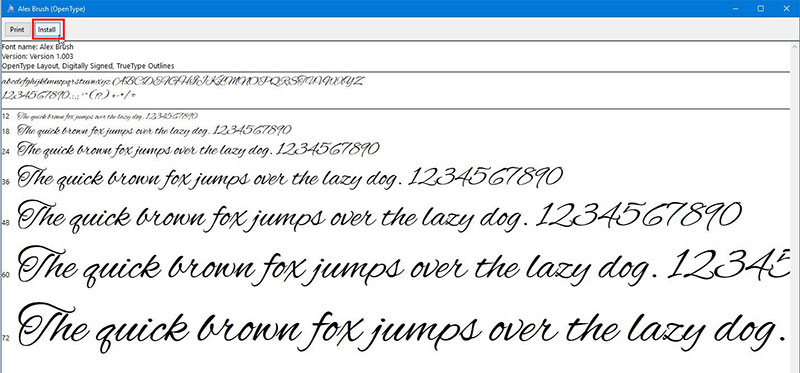
The second alternative is even easier, although it only works with TFF formats. Some fonts are immediately recognized by Windows, which means that by double-clicking them, an installer should open. From the installer, you should be able to see a preview of the font. Just press the “Install” button and you are done.
How to add fonts to GIMP – Linux

The process in Linux will depend on whether the Fontconfig utility has been correctly configured from the beginning.
If this is your case, you only have to put the font you downloaded in the ~/Fonts folder to appear in all programs that use the same utility.
As with Windows, there is the possibility to install the fonts exclusively in GIMP. You can do this by placing the font file inside the specially created fonts’ subdirectory in the GIMP installation folder. If you do not see the new characters in the program with this method, click on the “Update” button that appears when you select a font.
How to add fonts to GIMP – Mac OS X
Mac OS X also offers options very similar to those found in Windows. In the same way, you will have to close all the programs before proceeding with the installation.
Using Font Book
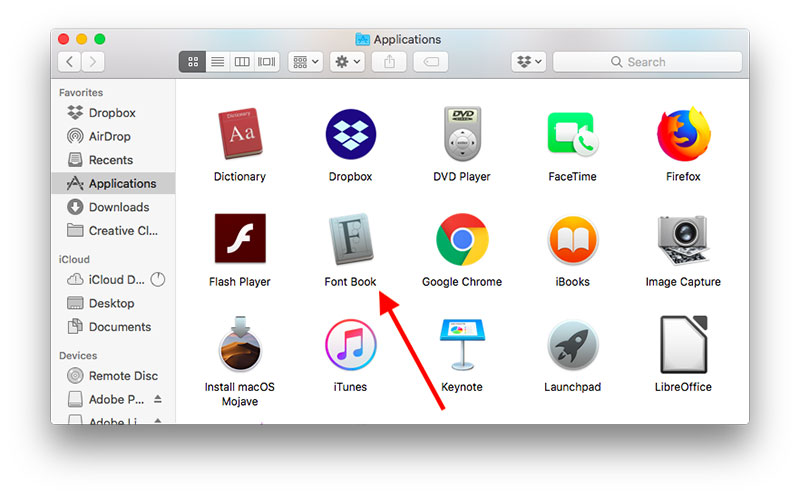
The first way is to use the Mac Font Book utility. This will automatically open when you double-click on any compatible font file.
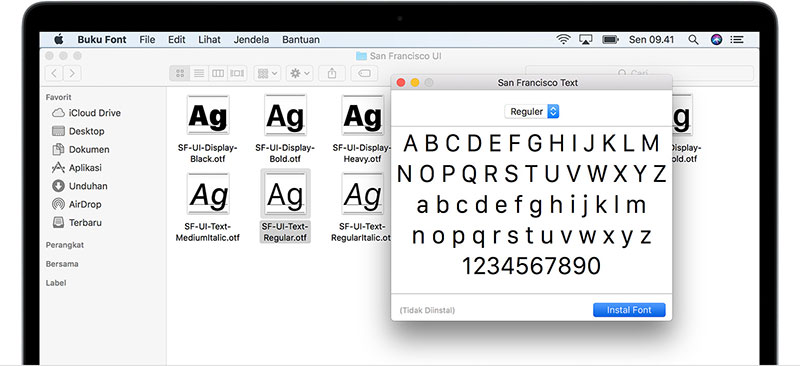
Font Book will open, displaying a preview of the characters. Press the blue button that says “Install” to finish the process. In this way, the font will be installed in your entire system, not only in GIMP.
From Font Book you can also mark the fonts that you don’t want to use so that the operating system disables them without uninstalling them; this is useful when you want to keep a large gallery on your computer.
Placing the file in the “Fonts” folder
In the Mac OS X library, you can find a folder called “Fonts”. Here are all the characters used by the computer. Just drag the compatible file to the folder and it should appear in programs that can use it.
This way also lets you install fonts in GIMP for specific users. Before entering the “Library”, select the folder with the name of the user where you want to install the font. The path would end up being similar to User/Library/Fonts.
Test your new GIMP fonts
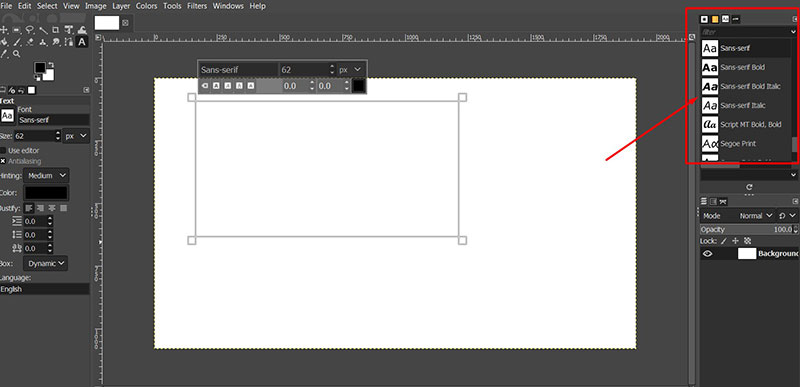
To know that the installation has been successful, you will have to open GIMP and look for it in the “Fonts” tab. Create any text to see the option, which will be identified with the “Aa” icon.
How to solve common problems
If the GIMP font pack does not load, try following these steps:
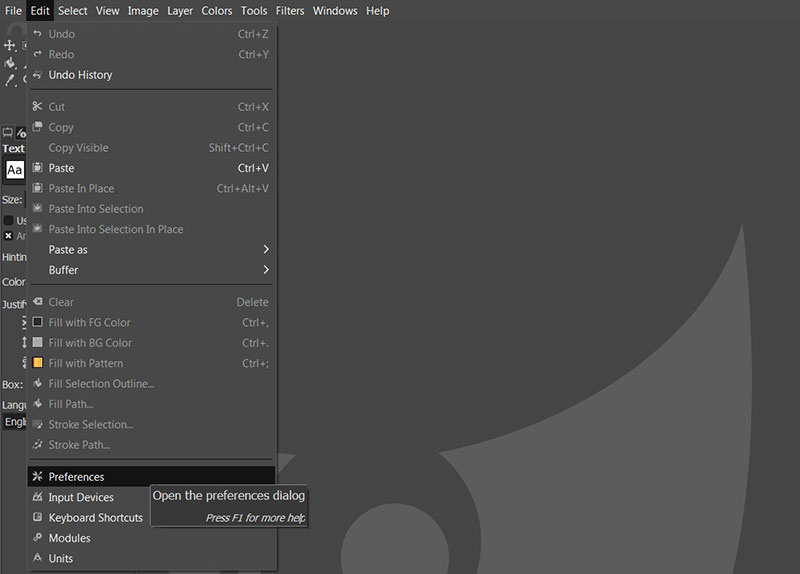
- In the “Edition” panel, open the “Preferences” tab. Here you must search the menu until you find the “Folders” option.
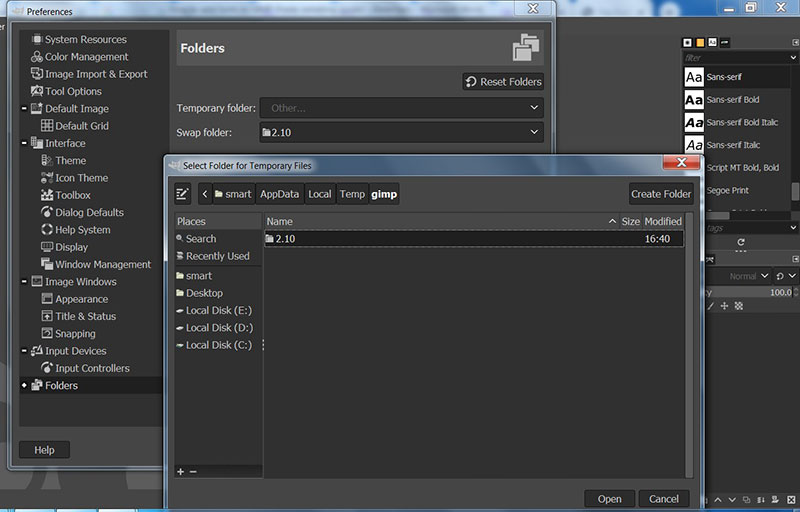
- From this menu, you can check if the font installation folder is appropriate. In this tab you can also add new locations, just click “Add a new folder”, and with the file selector, find the installation path.
- Press the “OK” button to save the changes.
If you enjoyed reading this article on how to add fonts to GIMP, you should read these as well:
- How to Add Fonts to Photoshop In A Few Easy Steps
- How to add fonts to FireAlpaca (FireAlpaca fonts guide)
- How to add fonts to Adobe Illustrator to use in vector
The post How to add fonts to GIMP (Fonts installing guide) appeared first on Design your way.
Source: https://ift.tt/3iJFnWg


No comments:
Post a Comment