Sure most of you have tried to capture a moving object with your camera maybe once or twice, at the end the background is kind of annoying without a feeling of motion in the image. How can you solve this problem? Adding a motion blur effect to the photo is definitely the ultimate solution. Also, using the haze effect could further help smooth and sharpen your photos to make the image looks more stylish.
Adding a blur effect to a particular aspect of your photos makes your actual theme become much clearer to the viewer. The key elements of your images are clearly distinguished from the background or surroundings. Blurring also adds more style to the image. It makes your object(s) in focus appear very intense and detailed compared to other irrelevant details in the photo. Mastering the art of blurred photography and learning how to blur a picture is a very relevant photography skill.
How can I add a blur effect to my photo?
You can achieve it with your camera during the shooting. However, the process can be a really complicated as it requires plenty of blurred photography skills in order to manipulate the camera Getting a perfect shot can be a very difficult task, especially for beginners.
Creative blur effects especially motion blur are one of the most popular and special tricks in photography. In order to capture the essence of motion and keep a subject in the photo focused, you need to know how to take note of shutter speed, lightening, stability and other technical settings which enable you to get those eye-catchy streaking of moving objects in your images.
In order to adding blur to a photo, you need to use a relatively slow shutter speed with low light sensitivity. To have driving cars or running people appear blurry, a shutter speed of 1/5 second should do the job. If you are using zoom at 1/10 second or slower shutter speeds, it is more advisable to use a tripod or any other nearby object in the scene you can rest your camera on. But if your camera uses OIS (Optical Image Stabilization), you might not necessarily need a tripod at these shutter speed settings.
Depending on what you want to focus your viewer’s attention on, there are different types of creative motion blur effects you can add to your photos like Zoom Blur, Water Blur, Vignette Blur etc which all require different techniques and settings.
But if you are that newbie photographer, who doesn’t know his/her around the camera or maybe you don’t have a good professional camera you will still love to create those cool blur effects on your photos. You can use a simple but professional editing software like PhotoWorks to help you achieve this same look very easily with little or no stress. Continue reading to learn how to blur out part of a picture step by step.
How can I add a blur effect to my image using PhotoWorks?
Having editing software like PhotoWorks with a simple and user-friendly interface quickly and smoothly retouching your images is something you don’t need to worry about. So, adding a blur to your photos is something you сan archive with this software in just a few clicks. Follow these simple steps to quickly add a blur effect to a particular portion of your photo as well as blur the background of your image.
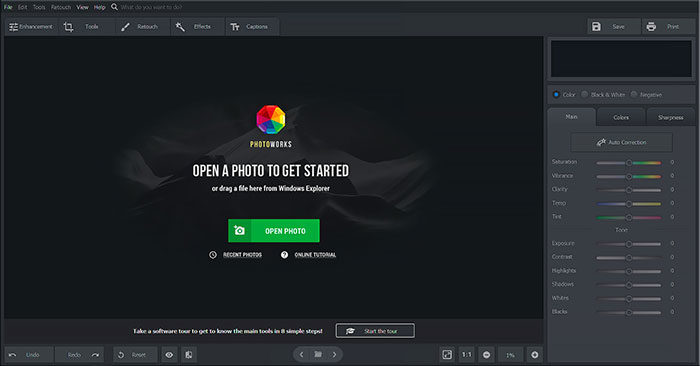
- First, import the image into PhotoWorks.
- Now open the Retouch tab, and select the Adjustment Brush.

- Then just paint over the portion of the original image you want to blur. Make sure you take your time when doing this so as to come up with the perfect selection.
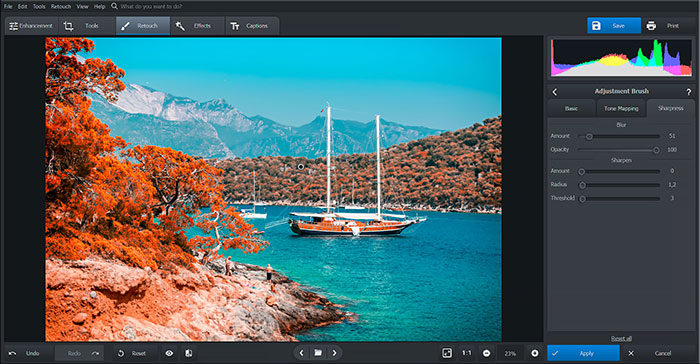
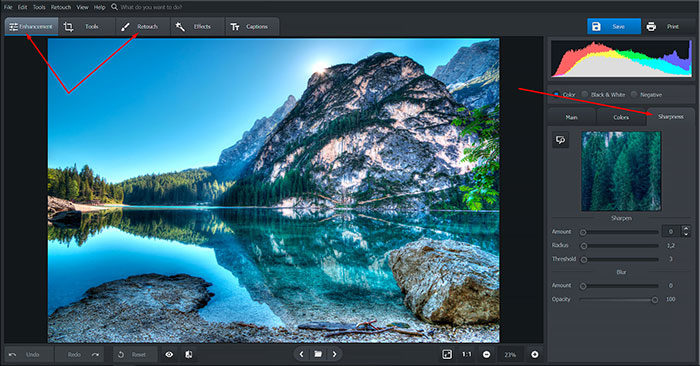
- When you are done with your selection, open the Sharpness menu and use the blur settings to get your desired blur effect. Click Apply to save changes.
How can I blur the whole background of my image?
- Click on the Retouch tab and select the Radial filter on the bottom right of the screen, and use the tool to make a round selection of your main subject.
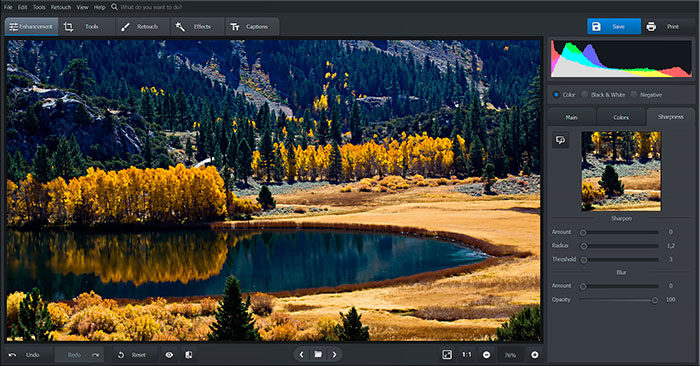
- Switch the Processing method to Outside since you want to work with the background only.

- Now click on the Sharpness tab and use the blur settings to get your desired effect. Click Apply to save the changes.
Conclusion
As you can see, adding a blur effect to your photos, especially the motion blur photography during the photo shoot requires some skills and techniques. No doubt, you will need some time to master them. Still, the good news is you can always archive that cool blur effect in PhotoWorks with a couple of clicks.
The post Break the barriers and style your photos with creative blur effects appeared first on Design your way.
Source: https://ift.tt/2BfZOWy


No comments:
Post a Comment