Those who spend a lot of time editing in Photoshop will find this article extremely useful. Photoshop Actions are the closest thing to magic for graphic designers and photographers. This useful tool allows you to bundle repetitive actions into a single one that will be automatically applied whenever you want it to. All the work will be done within seconds, without you having to worry about applying each step.
By the end of this article, you should know how to use Photoshop Actions and that will save you lots of time and effort. As you will notice yourself, the process is not complicated at all and it is extremely useful for batch editing.
Photoshop Actions – What Are They?
Simply put, Photoshop Actions are the recorded commands that you applied on an image. The same commands will be applied to the next image if you play the action you’ve just recorded. Basically, Photoshop will repeat all of your previous commands and apply them to a new file, thus saving you the time of doing it manually.
Photoshop is designed to make editing easy for everyone, and actions in Photoshop are the most useful tool for multi-step editing in batches. For instance, as a photographer, you need to obtain the same lighting adjustments on hundreds of photos, and that would be very difficult without using actions. Otherwise, you would have to repeat every single step, at the exact intensity, to obtain the same effect.
How to Use Photoshop Actions
You can use Photoshop Actions for many purposes. The main one is editing batches of photos, but that’s not the only way in which these can be useful. You can also use actions to edit all of your photos in the same style, without losing consistency. This matters in today’s world where an eye-pleasing Instagram feed can generate income.
Photoshop actions can be extremely useful if you know how to use them, so give it a shot and learn the amazing power of editing images automatically. Below you will learn the steps involved in using Photoshop Actions, carefully explained.
Turning them on…
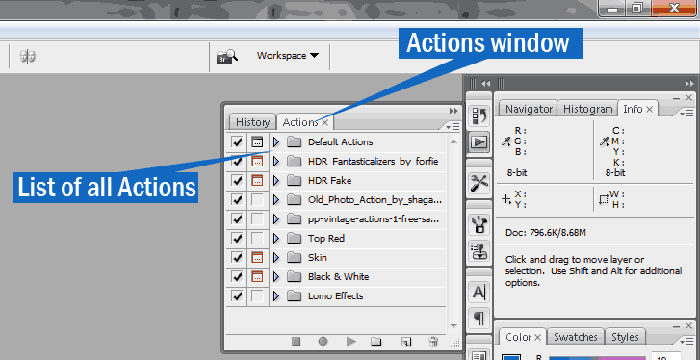
To turn on Photoshop Actions, you need to make your action palette visible. If you can’t see it on your interface, go to Menu and then select Window, and Actions. You can also do the same by clicking ALT (Option on Mac) + F9. Next, you need to take a look at the Actions panel and figure out each button. Here is a short list explaining the most important ones:
- Stop – it stops the recording of the actions you are making on the file
- Record – it begins recording a new action after clicking the button
- Play – plays a previously recorded action
- New Set – creates a new set of actions
- New Action – adds a new action to an existing set
- Delete – deletes a selected set of actions, a specific action or a command
And some concepts to get familiar with:
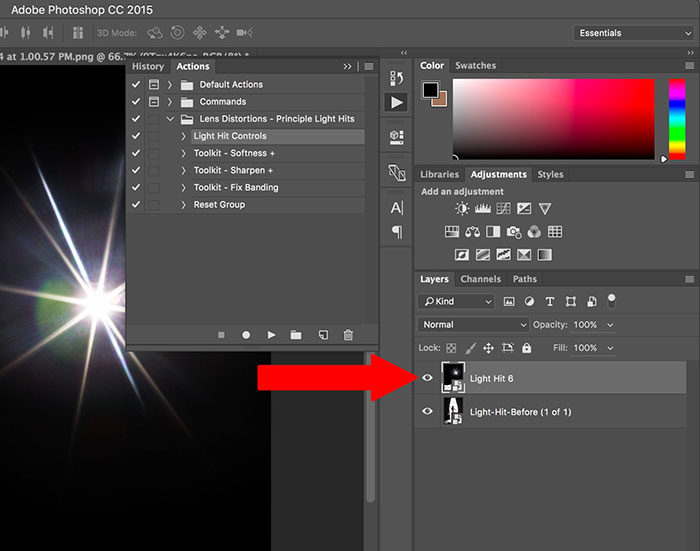
- Action Set – this is an entire folder where all your actions are organized
- Action – this is the action you will be running; it is a collection of multiple commands
- Steps/Command – this is one command from the many that form an action
- Checkbox – here you will find the commands that will be executed and those that won’t be executed, according to your preferences
- Menu dialog – here is where you can control user input into an action; making it visible allows the user to modify settings for each file separately
Managing them…
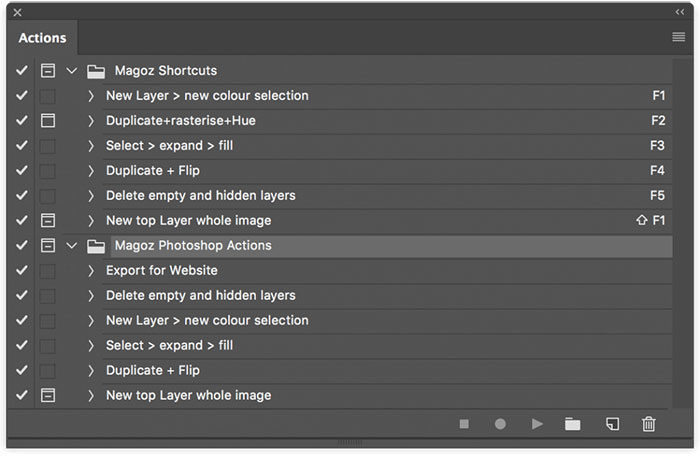
Now that you are familiar with how to use Photoshop Actions in terms of tools involved, you need to learn how to manage them. To organize your actions, you need to make sure that you give a name to each Action or Set that you create. Without naming your work, it will all become a mess. Use descriptive names and double-check the content before applying the action to a new file.
You can place groups of multiple actions under a set. Sets are the best way to manage Photoshop Actions when you have a lot to organize. The secret relies on naming the sets and actions properly so that you can quickly search through them. You can also drag and drop elements from one set or action to another.
How to use Photoshop actions with the Button Mode?
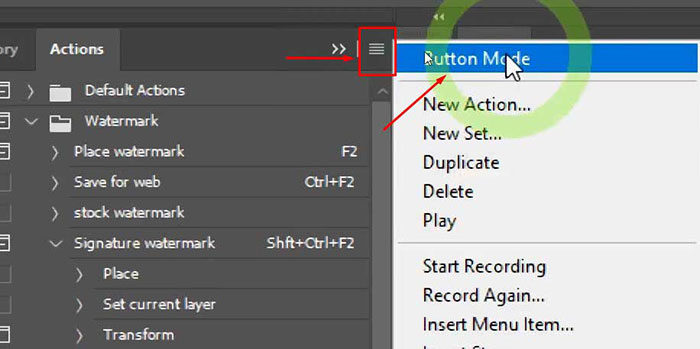
The entire Actions Panel can be switched to Button Mode, thus transforming all of your actions in simple, clickable buttons. This makes using actions much faster, but it would be best to use this mode when you are already familiar with Photoshop Actions.
Recording them…
If you still don’t understand how actions work, this short paragraph will definitely explain it clearer. While working on a photo, you can start recording what you’re doing and Photoshop is able to apply the same changes in the next file you will be opening in the program. Basically, Photoshop records all of your steps and recreates them when you apply that action on another file.
How to play actions?
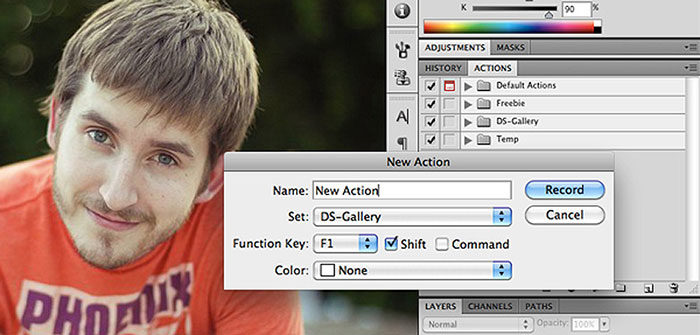
You probably understood how to use Photoshop Actions, but here is a detailed guide on how to record a new one:
- Open a file that you want to edit in Photoshop.
- Before beginning to edit anything, press “Begin Recording” in the Actions window. Every move you will make will be recorded from this point forward, including your keystrokes. Before making any change, think twice if you want it in the set. All actions are applied continually, so don’t forget about taking too long between changes.
- You can also create a new action directly by pressing the button with the same name in the Actions panel. This one will create a dialog box where you can enter the name of your new action. The process is the same as in the first case.
- After making all the desired changes, press “Stop” in the Actions window.
- From now on, you can play the action on other files.
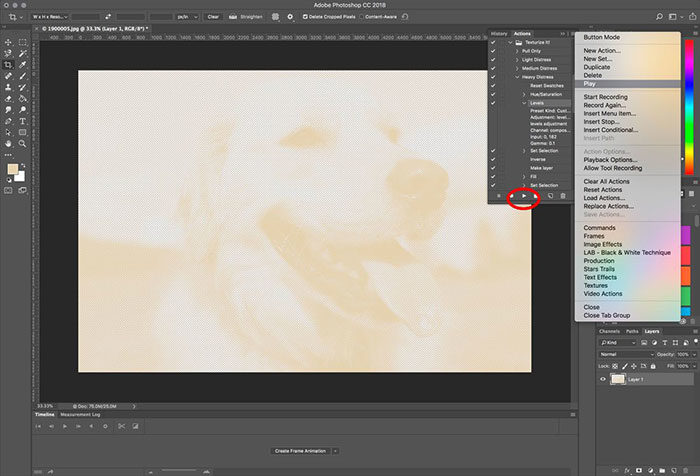
To play an action you’ve recorded:
- Button Mode: click on the action that you have to play
- List Mode: select the action that you want to play from the list and click on Play
Assigning a key to your action
To make it even easier to apply Actions to your files, you can assign keys to them. Photoshop is very user-friendly when it comes to assigning shortcuts, so this will be really helpful in the long run, especially if you want to edit files in the same manner at all given times.
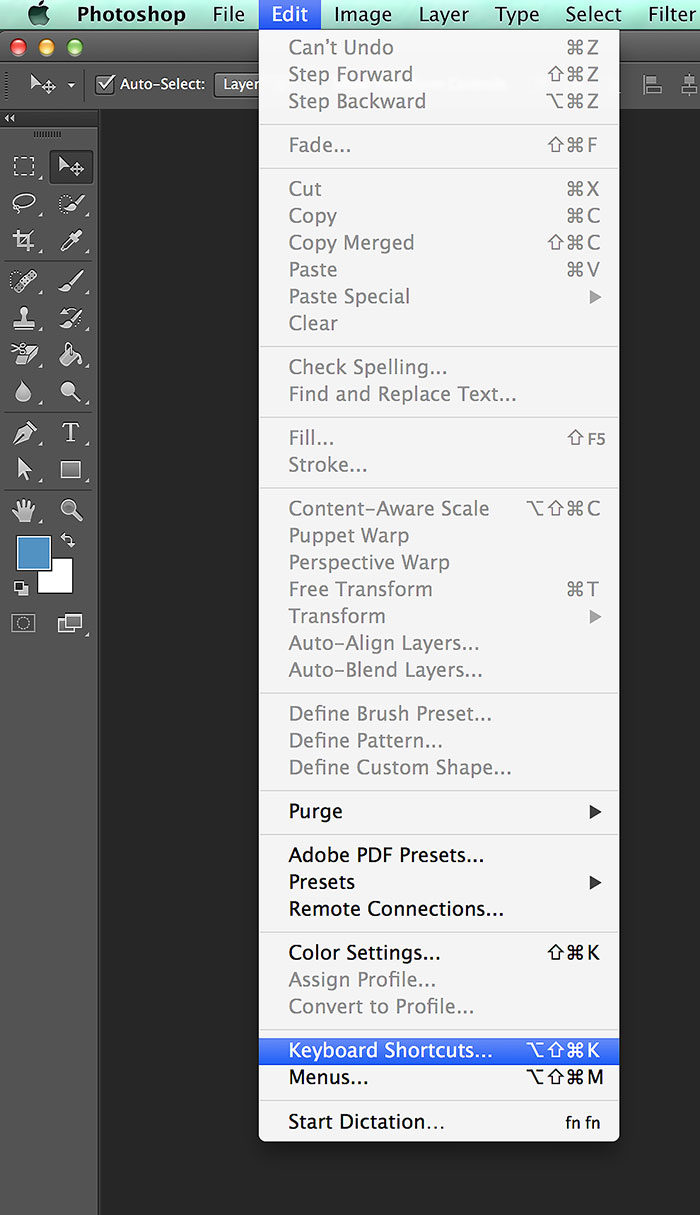
To set a shortcut, go to “Edit” and then “Keyboard Shortcuts”. In the dialog box, choose shortcuts for Panel Menus, expand Actions and for “Play”, assign the shortcut that is the most convenient for you.
Other tips on how to use Photoshop Actions
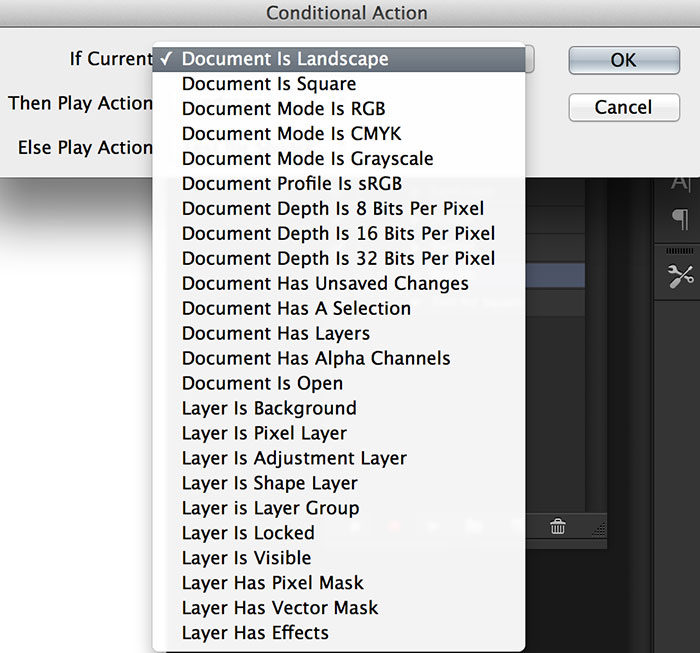
After learning how to use Photoshop Actions, you can apply other useful tips that will make your workflow process smoother. To edit only specific images using actions, use the Conditional Actions feature, which lets you update multiple images at once. You can set filters based on the image’s size, shape or other criteria.
For instance, if you have to edit a batch of images that include both landscape and portrait orientations, you don’t have to separate them in order to edit them all at once, because you can use Conditional Actions with a parameter set on size.
Hopefully, the tips you found in this article will be helpful. Learning how to use Photoshop Actions can be life-changing for a person who works with large batches of photos, so give this article a good read and get to work.
If you enjoyed reading this article about how to use Photoshop Actions, you should read these as well:
- Free Photoshop Actions For Photographers (100 of The Best)
- Pink background images to use in your design projects
- Wood background textures that you can add in your designs
- Beautiful Christmas wallpaper examples you should download
The post How to Use Photoshop Actions and Save A Ton of Time While Designing appeared first on Design your way.
Source: https://ift.tt/2OTVCSK


No comments:
Post a Comment